
Introduction
Hugo is a fast and flexible static site generator written in Go. With Hugo, you can quickly build and deploy a blog using Markdown files.
I’m kicking off this blog with a hands-on guide to building and deploying your own website from scratch. In this tutorial, I’ll show you how to:
- Set up a blog using Hugo
- Pick and customize a theme
- Add a CV page
- Use Cloudflare for performance, security, and free SSL
- Deploy your site with GitHub Actions for automated publishing
By the end, you’ll have a fully functional, fast, and professional-looking blog — ready for your own domain (if you feel like buying one 😉). Either way, it runs at zero hosting cost.
Let’s get started!
Installation
🛠️Install Hugo
First, install Hugo on your system. You can find the installation instructions for your platform on the official Hugo website.
For example, on macOS:
1brew install hugo
On Ubuntu:
1sudo apt-get install hugo
Create a New Site
Open your terminal and run the following command, replacing myblog with your desired site name:
1hugo new site myblog
2cd myblog
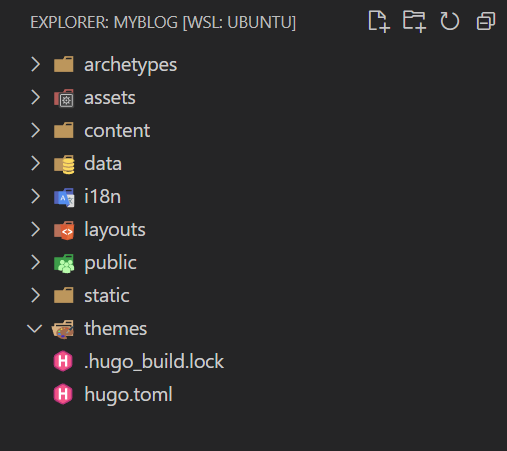
This creates a new directory with the basic structure for your blog.
Add themes
Browse the Hugo Themes gallery to choose a theme that fits your style and needs. For this tutorial, we’ll use hugo-theme-stack for the main theme, as it offers a modern design and is easy to customize.
To add a CV page, we’ll also include the Almeida CV theme.
You can pick any theme you like, or even create your own for a personalized look.
1git init
2# install main theme
3git submodule add https://github.com/CaiJimmy/hugo-theme-stack/ themes/hugo-theme-stack
4# install CV theme
5git submodule add https://github.com/ineesalmeida/almeida-cv.git themes/almeida-cv
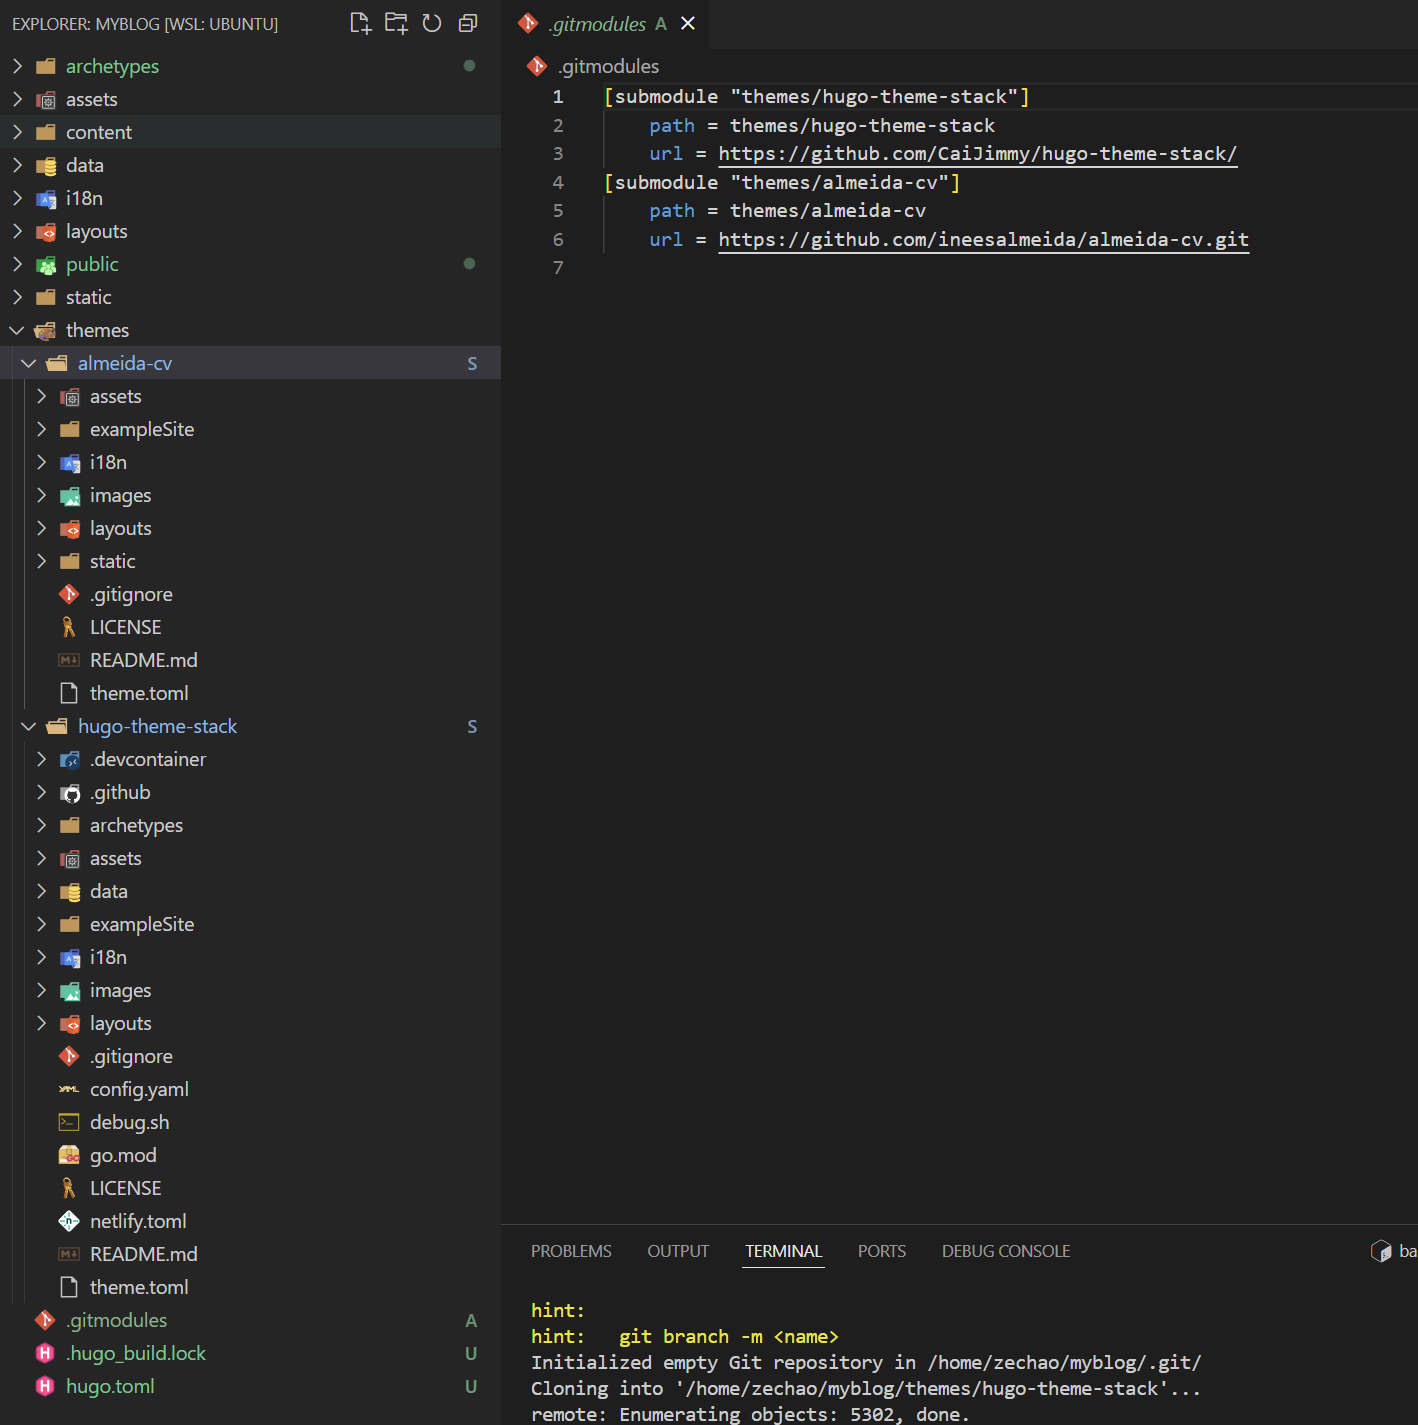
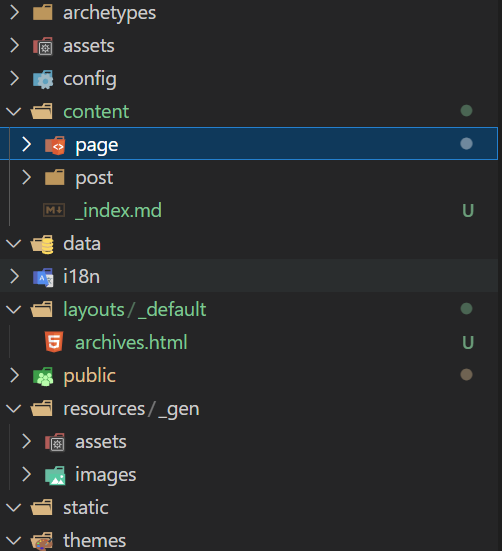
After running these commands, you’ll see the themes installed in your project’s themes/ directory:
You can verify the installation by checking that the theme folders appear as shown below.
Before proceeding, update hugo.toml, A configuration file to customize your site settings and enable the themes you’ve added.
for now just add
baseURL: The URL where your site will be hosted. If you don’t have a custom domain yet, you can use a placeholder likehttps://example.com/. You’ll update this later when deploying your website.title: The name of your site, which appears in the browser tab and site header.theme: The theme(s) your site will use .Multiple themes can be listed, with precedence given from left to right.languageCode: The language code for your site content (e.g.,en-usfor English).
1baseURL = 'https://www.devzechao.com/'
2title = 'My first blog'
3languageCode = 'en-us'
4theme = ["hugo-theme-stack", "almeida-cv"]
We’ll add more configuration later, for more detail, check All settings.
Check installation
If everything went smoothly, you can now launch your site locally to verify it’s working.
Open your terminal and run:
1# Start the Hugo server in dev mode on port 8080 (you can change the port if needed)
2hugo server -p 8080
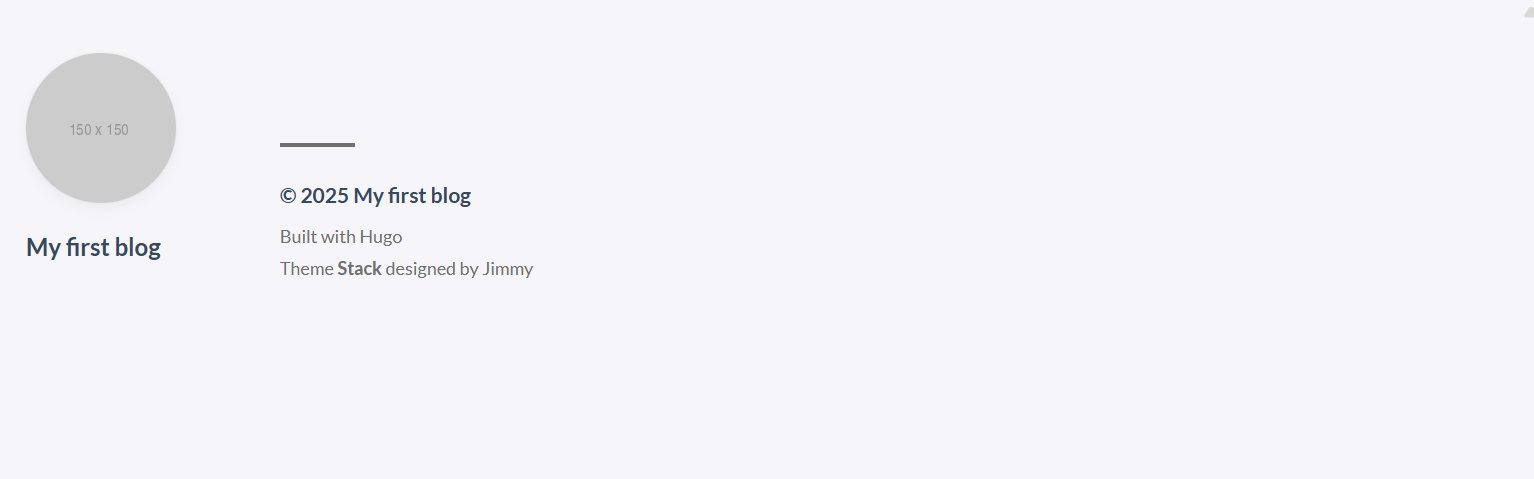
Open the site, you will see a main page of hugo-theme-stack with almost nothing, don’t worry! We’re going to add more content soon.
Configure your main page
In this section, we’ll set up the hugo-theme-stack theme for the home page
💡 Note: Every Hugo theme has its own configuration options and folder structure. Be sure to check the theme documentation for details on features and customization.
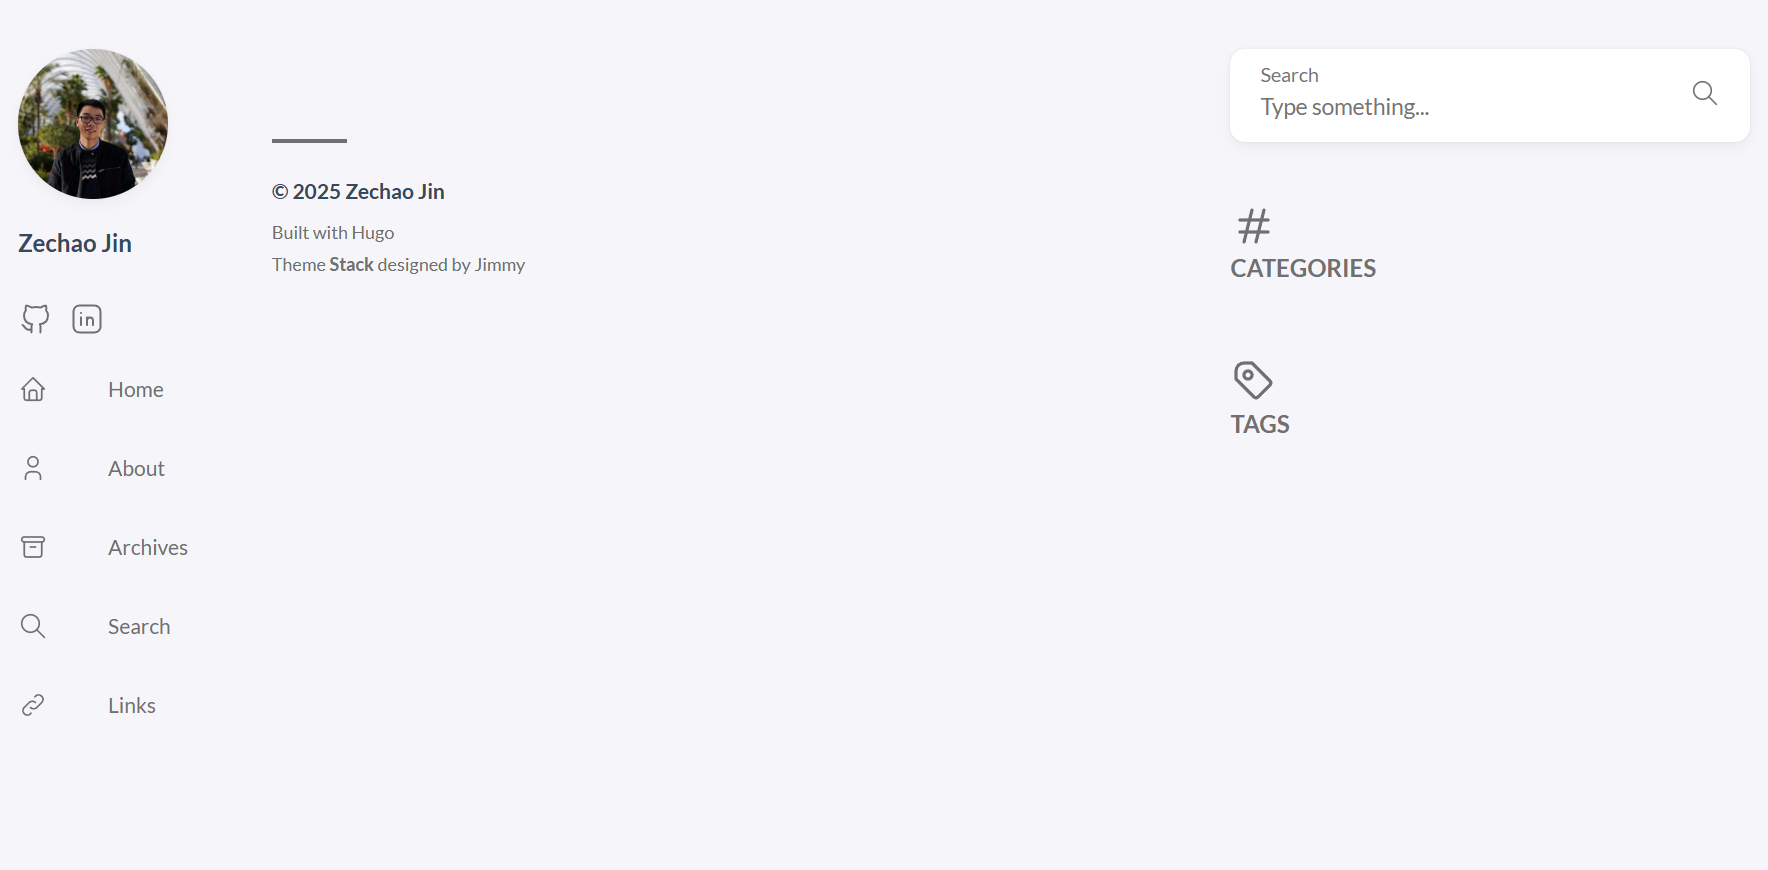
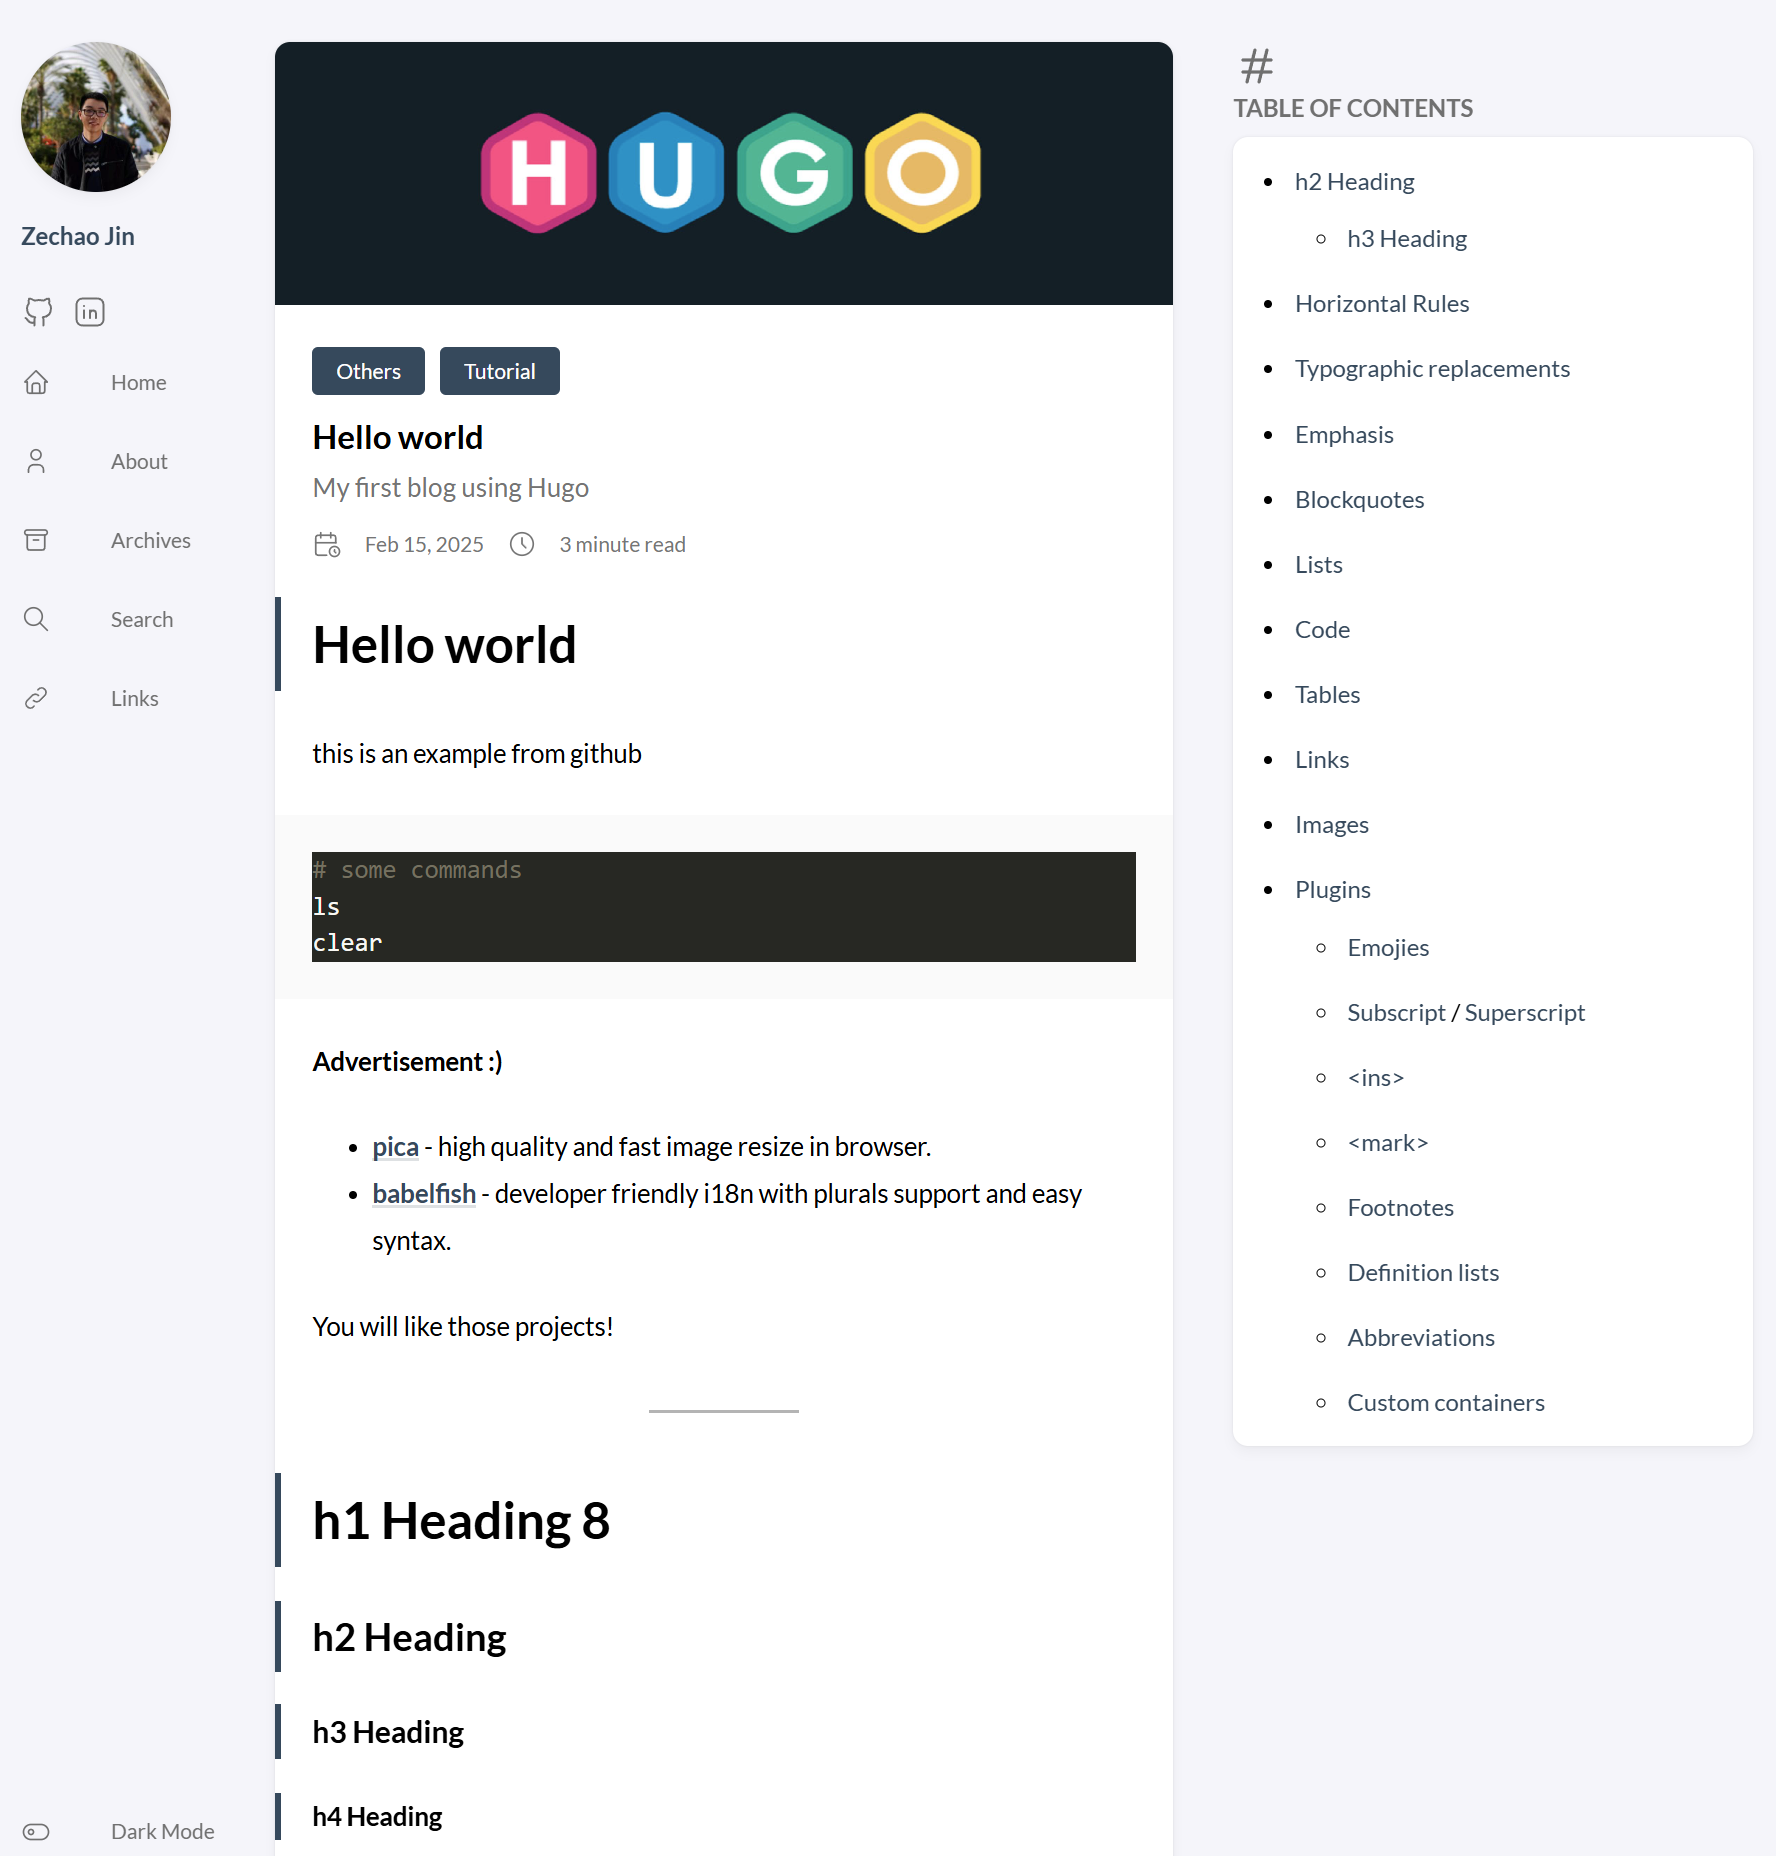
If everything is set up correctly, your main page will look like this:
Sidebar
Let’s configure the sidebar on your main page.
Page tabs
Navigate to themes/hugo-theme-stack/exampleSite/content/page to find example pages provided by the hugo-theme-stack theme. Copy these example pages into your project’s content directory to quickly set up your tabs.
Additionally, copy themes/hugo-theme-stack/exampleSite/content/_index.md into your content folder. This step is optional but recommended, as it enables a Home tab on your site for easier navigation.
1cp -r ./themes/hugo-theme-stack/exampleSite/content/page/ ./content/
2cp -r ./themes/hugo-theme-stack/exampleSite/content/_index.md ./content/
Each page tab serves a specific purpose. For example, the Search tab lets visitors search your site, while the Links tab can showcase your favorite or important links.
Later, we’ll customize our about tab to show our cv using almeida-cv.
You can customize the content of each tab by editing its respective index.md file inside the corresponding folder. If you don’t need a particular tab, simply remove its folder from the content/page directory.
Avatar
For your avatar, create a folder img under /assets and put your avatar image inside:
1mkdir ./assets/img
Next, add an avatar-related configuration to hugo.toml. You can also change the site title to your name (e.g., Zechao Jin):
1[params.sidebar.avatar]
2enabled = true
3local = true
4src = "img/zechao.jpg"
Social media icons
Create a new configuration file menu.toml under config/_default:
1mkdir  config/_default
2touch config/_default/menu.toml
Add your social profiles to the menu.toml file you just created using TOML syntax. Each social link is defined as a table with fields like identifier, name, url, and an icon reference. For example:
 1[[social]]
 2identifier = "github"
 3name = "GitHub"
 4url = "https://github.com/<zechao>"
 5[social.params]
 6icon = "brand-github"
 7
 8[[social]]
 9identifier = "linkedin"
10name = "Linkedin"
11url = "https://www.linkedin.com/in/zechao-jin-676866150/"
12[social.params]
13# icon name must match you svg name
14icon = "linkedin"
For more available fields and advanced configuration options, refer to the theme documentation.
Enable Theme Features
Before moving on, we need to update hugo.toml to enable key theme features like Widgets and Article Configuration.
Add the following configuration in hugo.toml:
 1[params.article]
 2math = true
 3toc = true
 4readingTime = true
 5license.enabled = true
 6license.default = "Licensed under CC BY-NC-SA 4.0"
 7
 8[params.widgets]
 9homepage = [
10    { type = "search" },
11    { type = "categories", params = { limit = 10 } },
12    { type = "tag-cloud", params = { limit = 10 } },
13]
14page = [{ type = "toc" }]
Create Your First Post
All blog posts go inside the content/post folder. Create your first post using command:
1hugo new content content/post/first_post/index.md
It will create a markdown file with article configuration, with draft status (draft = true), this prevent unfinished post being posted.
1+++
2date = '2025-07-10T23:55:49+02:00'
3draft = true
4title = 'My First Post'
5+++
To preview your site locally with drafts, run: hugo server -D -p 8080,
⚠️ When your post is ready to publish, don’t forget to set (draft = false):
Frontmatter Configuration
The theme supports additional fields for your posts. Here’s an example:
 1+++
 2author = "Zechao jin"
 3title = "Hello world"
 4date = "2025-02-15"
 5description = "My first blog using Hugo"
 6toc = true
 7categories = [
 8    "others",
 9    "tutorial",
10]
11tags = [
12    "Hugo",
13	"Cloudflare",
14	"Github"
15]
16keywords=[
17    "Hugo",
18    "CV",
19    "CV",
20    "Tutorial"
21]
22image = "image.png"
23+++
For mode detail, check the theme documentation Frontmatter Configs
.
🎉 Congratulations! You’ve now set up your main page and published your first post with hugo-theme-stack locally.
⚠️ Troubleshooting:
If your post images aren’t appearing, it’s likely due to Hugo’s fast rendering feature. To fix this, restart the server with fast rendering disabled:
1hugo server --disableFastRender -D -p 8080
Understading Hugo’s layout
How does Hugo’s layout system work?
Now that you’ve followed the tutorial to set up your blog, it’s important to understand how Hugo’s layout system works—specifically, its “override” and “inheritance” logic. This knowledge will help you customize your website more effectively while using themes.
Let’s examine the content/page/archives/index.md file. You’ll notice it has a layout parameter set to archives. This tells Hugo to use the archives layout when rendering this page.
 1---
 2title: "Archives"
 3date: 2019-05-28
 4layout: "archives"
 5slug: "archives"
 6menu:
 7    main:
 8        weight: -70
 9        params:
10            icon: archives
11---
How Hugo finds layouts
Hugo searches for layout templates in a specific order, starting from the most specific in your project and falling back to the theme if necessary. For example, for the archives layout, Hugo will look for:
layouts/_default/archives.htmlin your project- If not found,
layouts/_default/archives.htmlin the theme directory (e.g.,themes/hugo-theme-stack/layouts/_default/archives.html)
Key point:
Whenever you place a file in your project’s folder—such as in layouts/, assets/, static/, archetypes/, i18n/, or data/, with the same path and filename as one in the theme, Hugo will use your version instead of the theme’s. This override mechanism lets you safely customize templates, assets, static files, and more without touching the theme directly, so your changes won’t be lost when the theme is updated. The override rule applies to all these folders except for themes/ itself and the content/ directory, which don’t support override in this way.
For more details, see the Hugo documentation on lookup order.
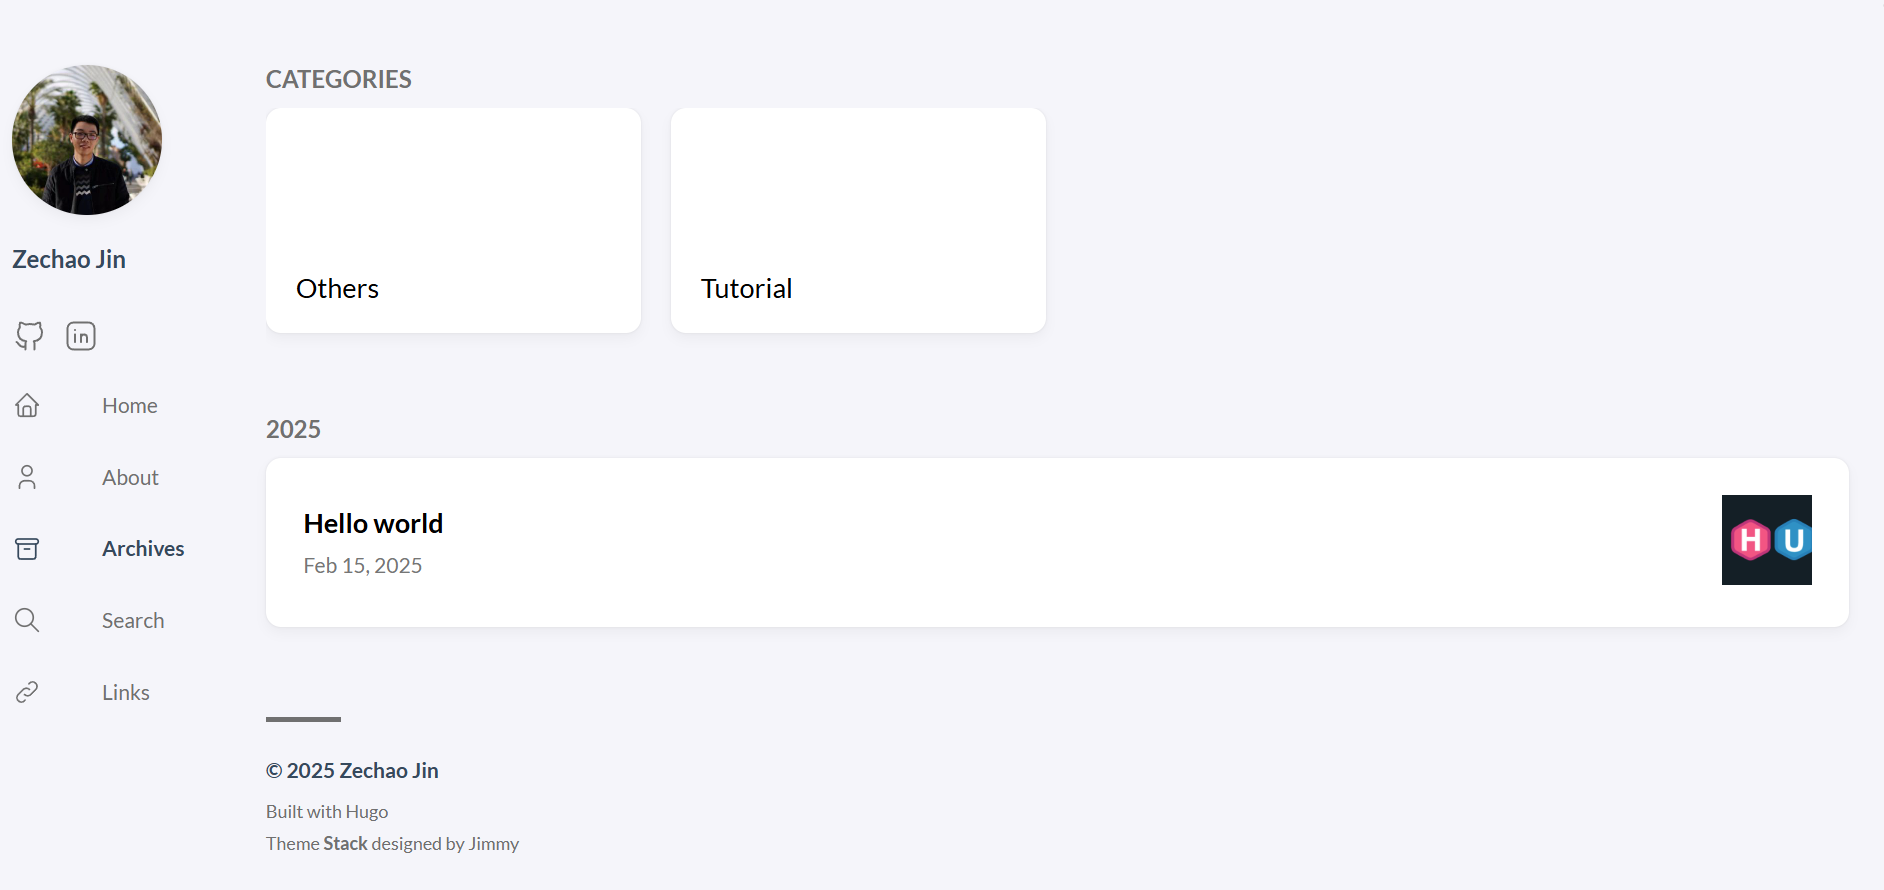
Customizing the Archives Page
By default, your archives page will look like this:
To customize the layout, you can override the theme’s template by copying it into your project’s layout directory. Follow these steps:
-
Copy the archives layout file:
1mkdir -p ./layouts/_default
2cp ./themes/hugo-theme-stack/layouts/_default/archives.html ./layouts/_default/archives.html
Your project structure should now include the new layout file:
-
Edit the copied layout:
Open
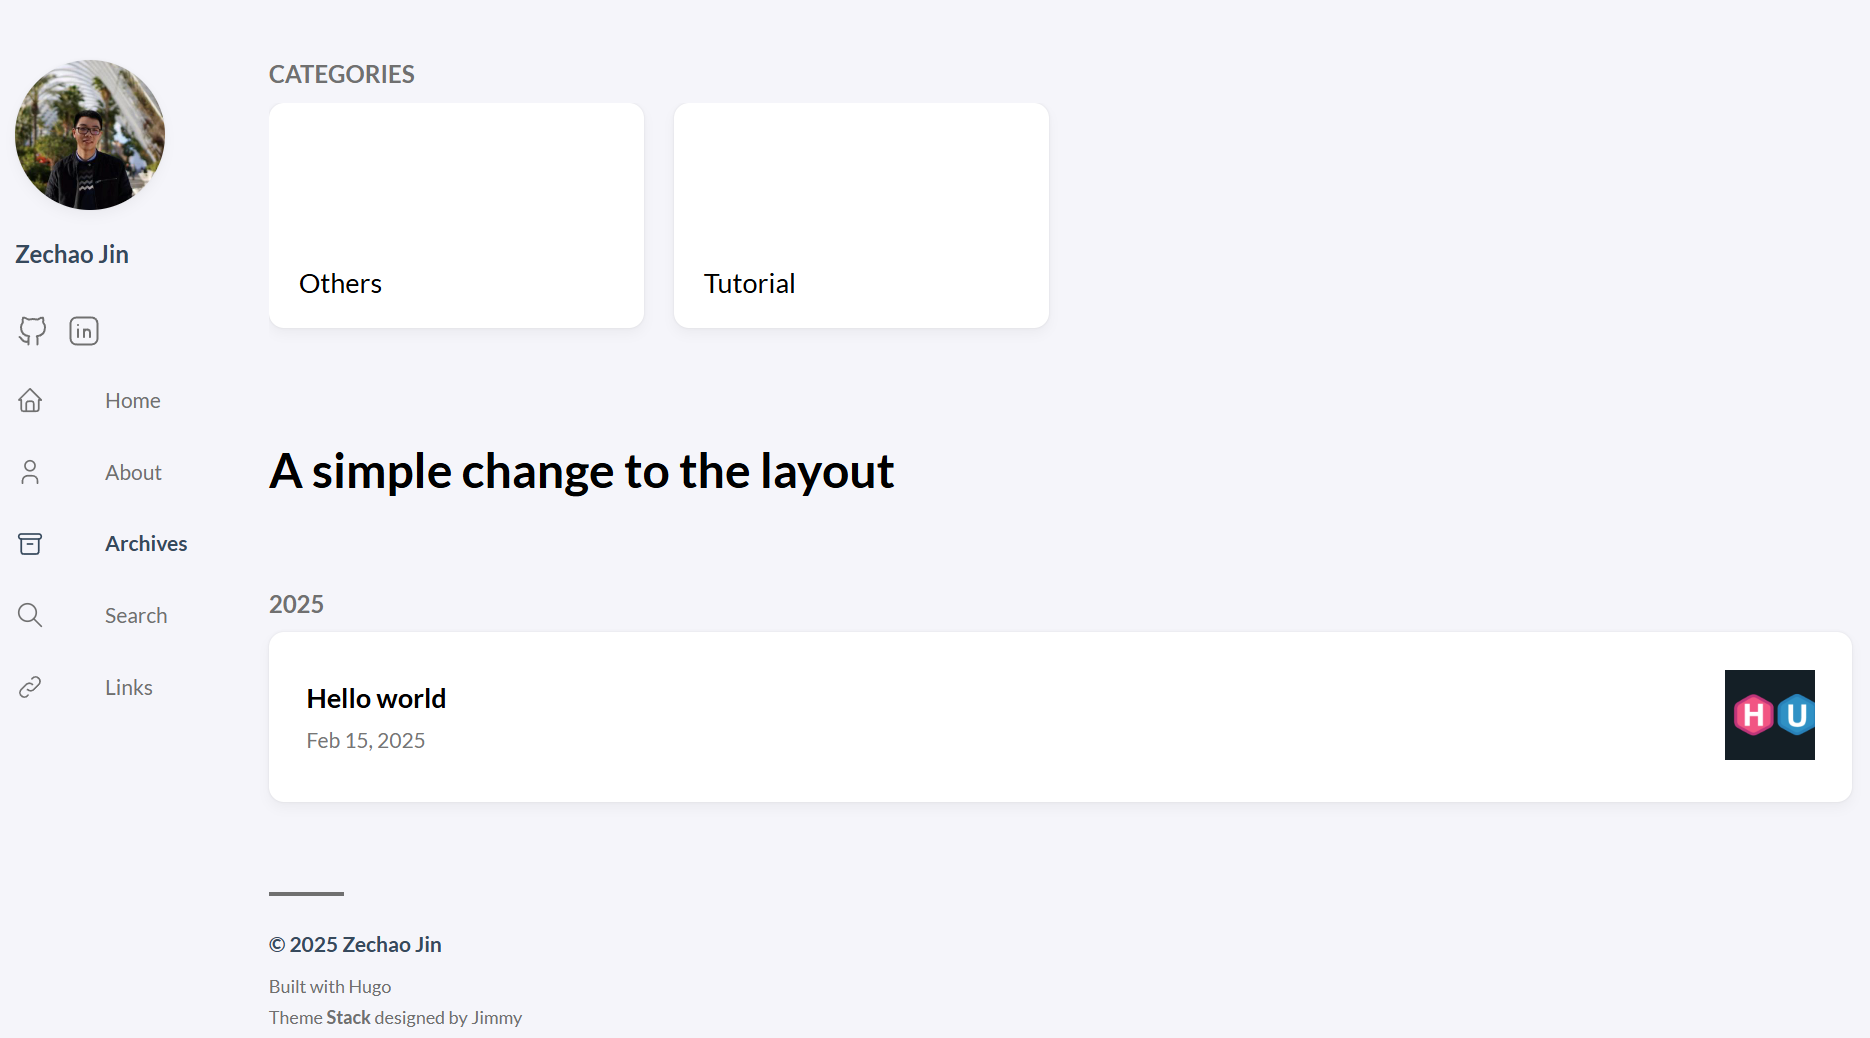
./layouts/_default/archives.htmlin your editor. For example, to make a visible change, add the following line right after the</header>tag:1<h1>A simple change to the layout</h1> -
Preview your changes:
Refresh your site in the browser. You should see your custom heading on the Archives page:
This approach lets you safely experiment and personalize your blog’s appearance while keeping theme updates straightforward. So, Why NOT change the theme directly? Because when the theme author updates their theme, it will override our changes.
Create your CV page
Create a new CV layout
Now that we understand how Hugo’s layouts work, let’s create our CV. If you check the example site of the almeida-cv theme, you’ll see all the CV information is stored in the data/content.yaml file.
So, let’s copy this file into your project’s data folder and fill in your own CV details:
1cp themes/almeida-cv/exampleSite/data/content.yaml data/content.yaml
Next, we need to find the layout used to render the CV. It’s located at themes/almeida-cv/layouts/index.html
Here’s the issue: Both themes define their own layouts/index.html. Since in our config.toml we set theme = ["hugo-theme-stack", "almeida-cv"], Hugo gives priority to hugo-theme-stack As a result, when rendering the homepage, Hugo uses hugo-theme-stack’s index.html instead of almeida-cv’s.
✅ The solution is simple: Create your own layout. Copy index.html from almeida-cv place it in your project’s layouts and change its name to cv.html
1# copy file
2cp themes/almeida-cv/layouts/index.html layouts
3# rename to cv.html
4mv layouts/index.html layouts/cv.html
To set the CV avatar, create an img folder inside the static directory and place your photo there. This is required by the almeida-cv theme. the name of the path must match with Photo field of content.yaml.
1# copy file
2mkdir static/img
Turn About page into CV page
Now that we have our data/content.yaml filled and the CV layout created, it’s time to change our about page, replace content/page/about/index.md with following configuration:
 1---
 2title: About me
 3layout: cv
 4url: "/about"
 5aliases:
 6  - /resume
 7  - /about-me
 8menu:
 9    main:
10        weight: -90
11        params:
12            icon: user
13            newTab: true
14---
You CV page should look like follow:
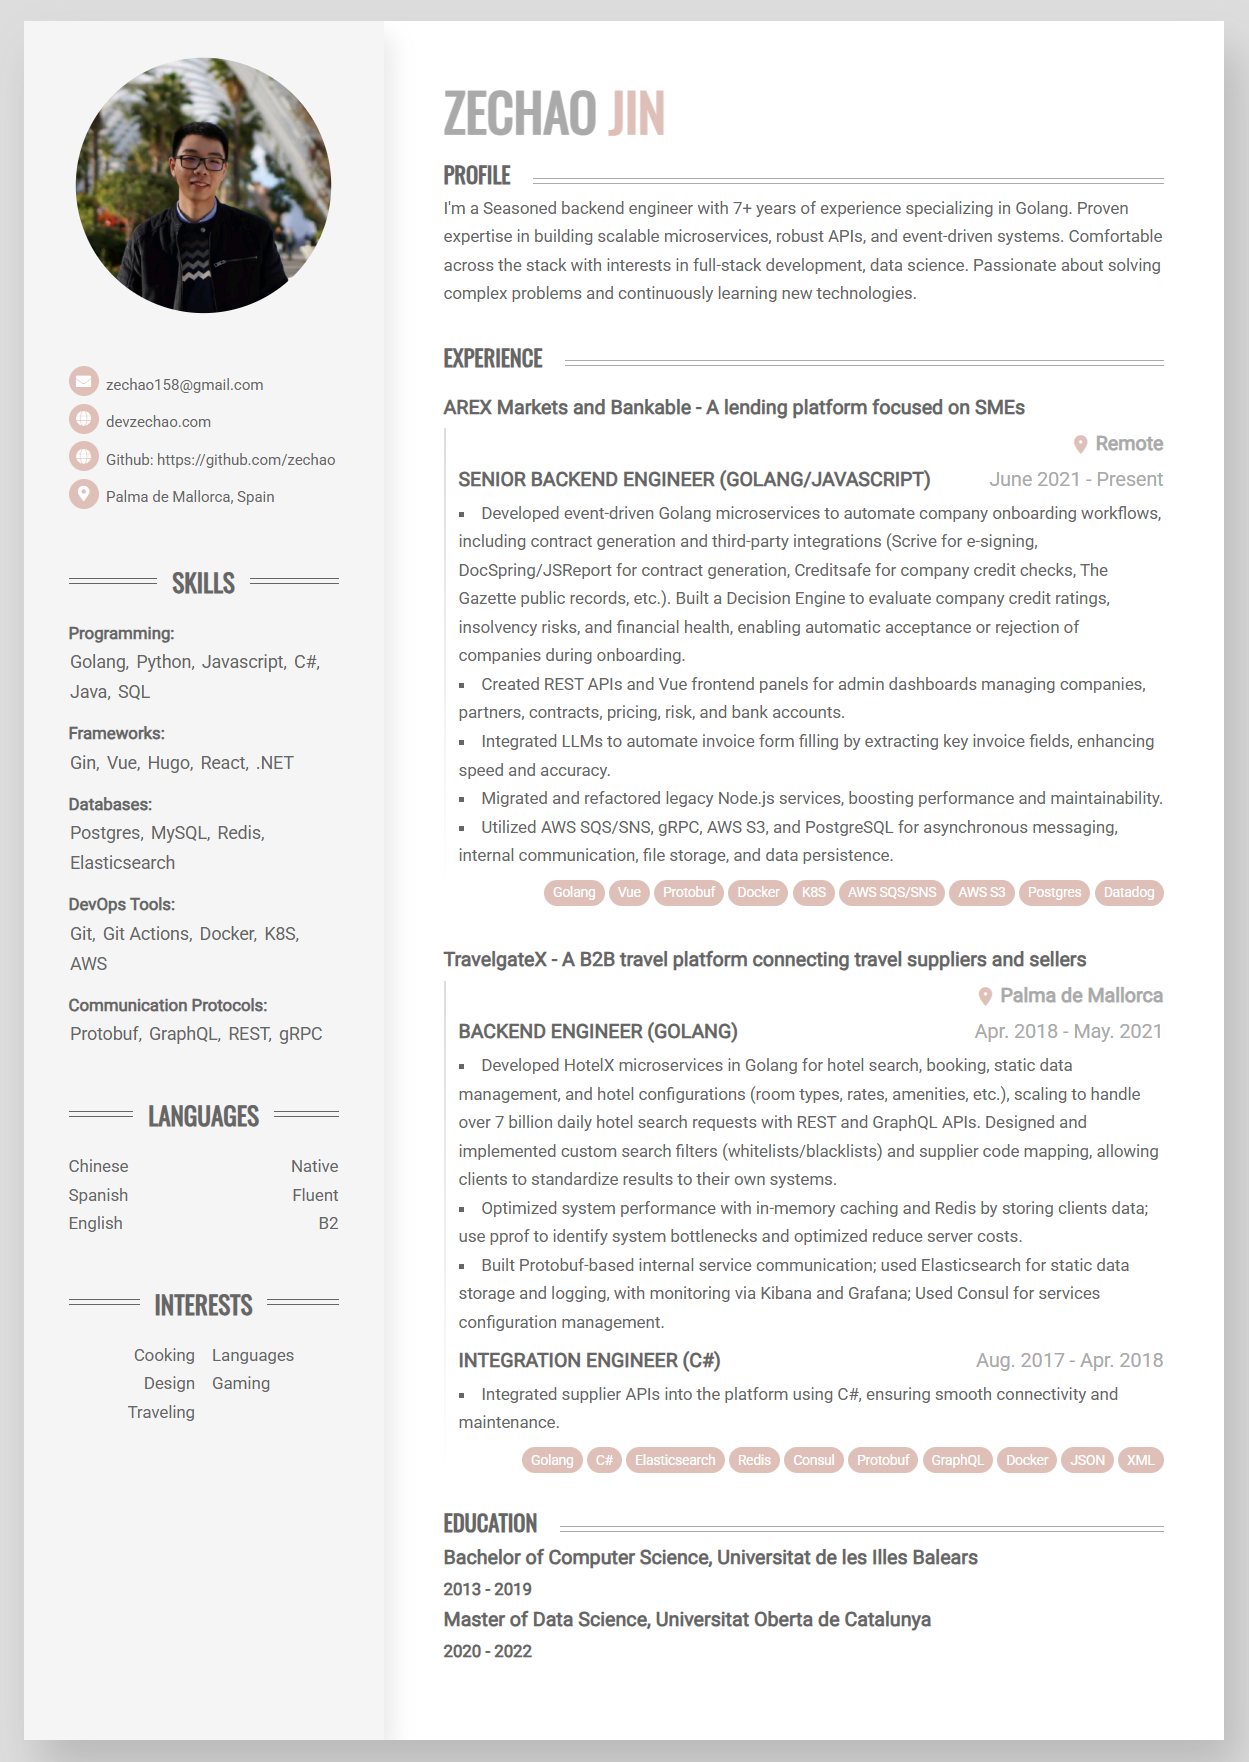
almeida-cv provides the following configuration, make change as your need by putting them in hugo.toml
 1[params]
 2enableRobotsTXT = true
 3enableEmoji = true
 4# param for almeida-cv
 5enableMetaTags = true
 6colorLight = "#fff"
 7colorDark = "#666"
 8colorPageBackground = "#ddd"
 9colorPrimary = "#e3bfb8"
10colorSecondary = "#aaa"
11colorIconPrimary = "#fff"
12colorIconBackground = "#e3bfb8"
13colorRightColumnBackground = "#f5f5f5"
14colorRightColumnHeadingText = "#666"
15colorRightColumnBodyText = "#666"
16colorRightColumnIconPrimary = "#fff"
17colorRightColumnIconBackground = "#e3bfb8"
18pages = 1
19# Set this param to 'true' to swap the bar positions
20swapColumns = true
Deploy your blog
🚀 Push Your Hugo Project to GitHub
Before you can publish your blog, you need to store your source code in a remote repository. GitHub is a popular choice for version control and collaboration.
Follow these steps to push your Hugo project to GitHub:
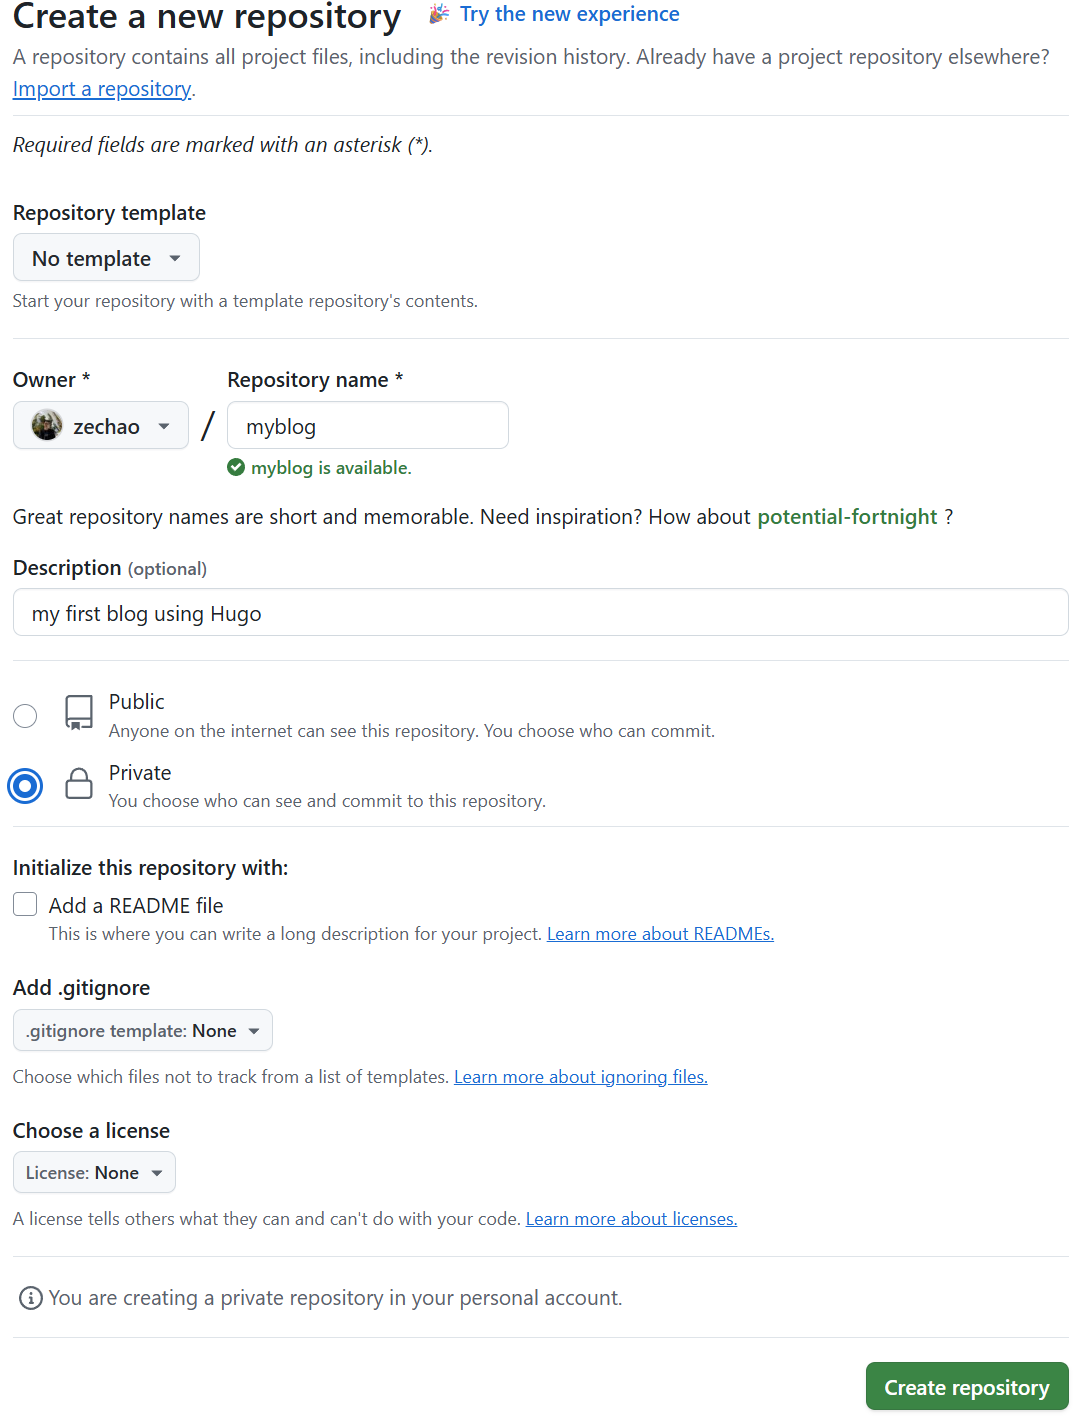
1. Create a new repository on GitHub
- Go to github.com and log in.
- Click “+” → New repository.
- Name your repo (e.g.,
my-resume-site). - Choose Public or Private. I recommend prive, since we don’t want to anybody view our source code.
- Do NOT initialize with a README, .gitignore, or license (we’ll do it locally).
- Click Create repository.
2. Initialize Git in your project
You can follow the Github instruction
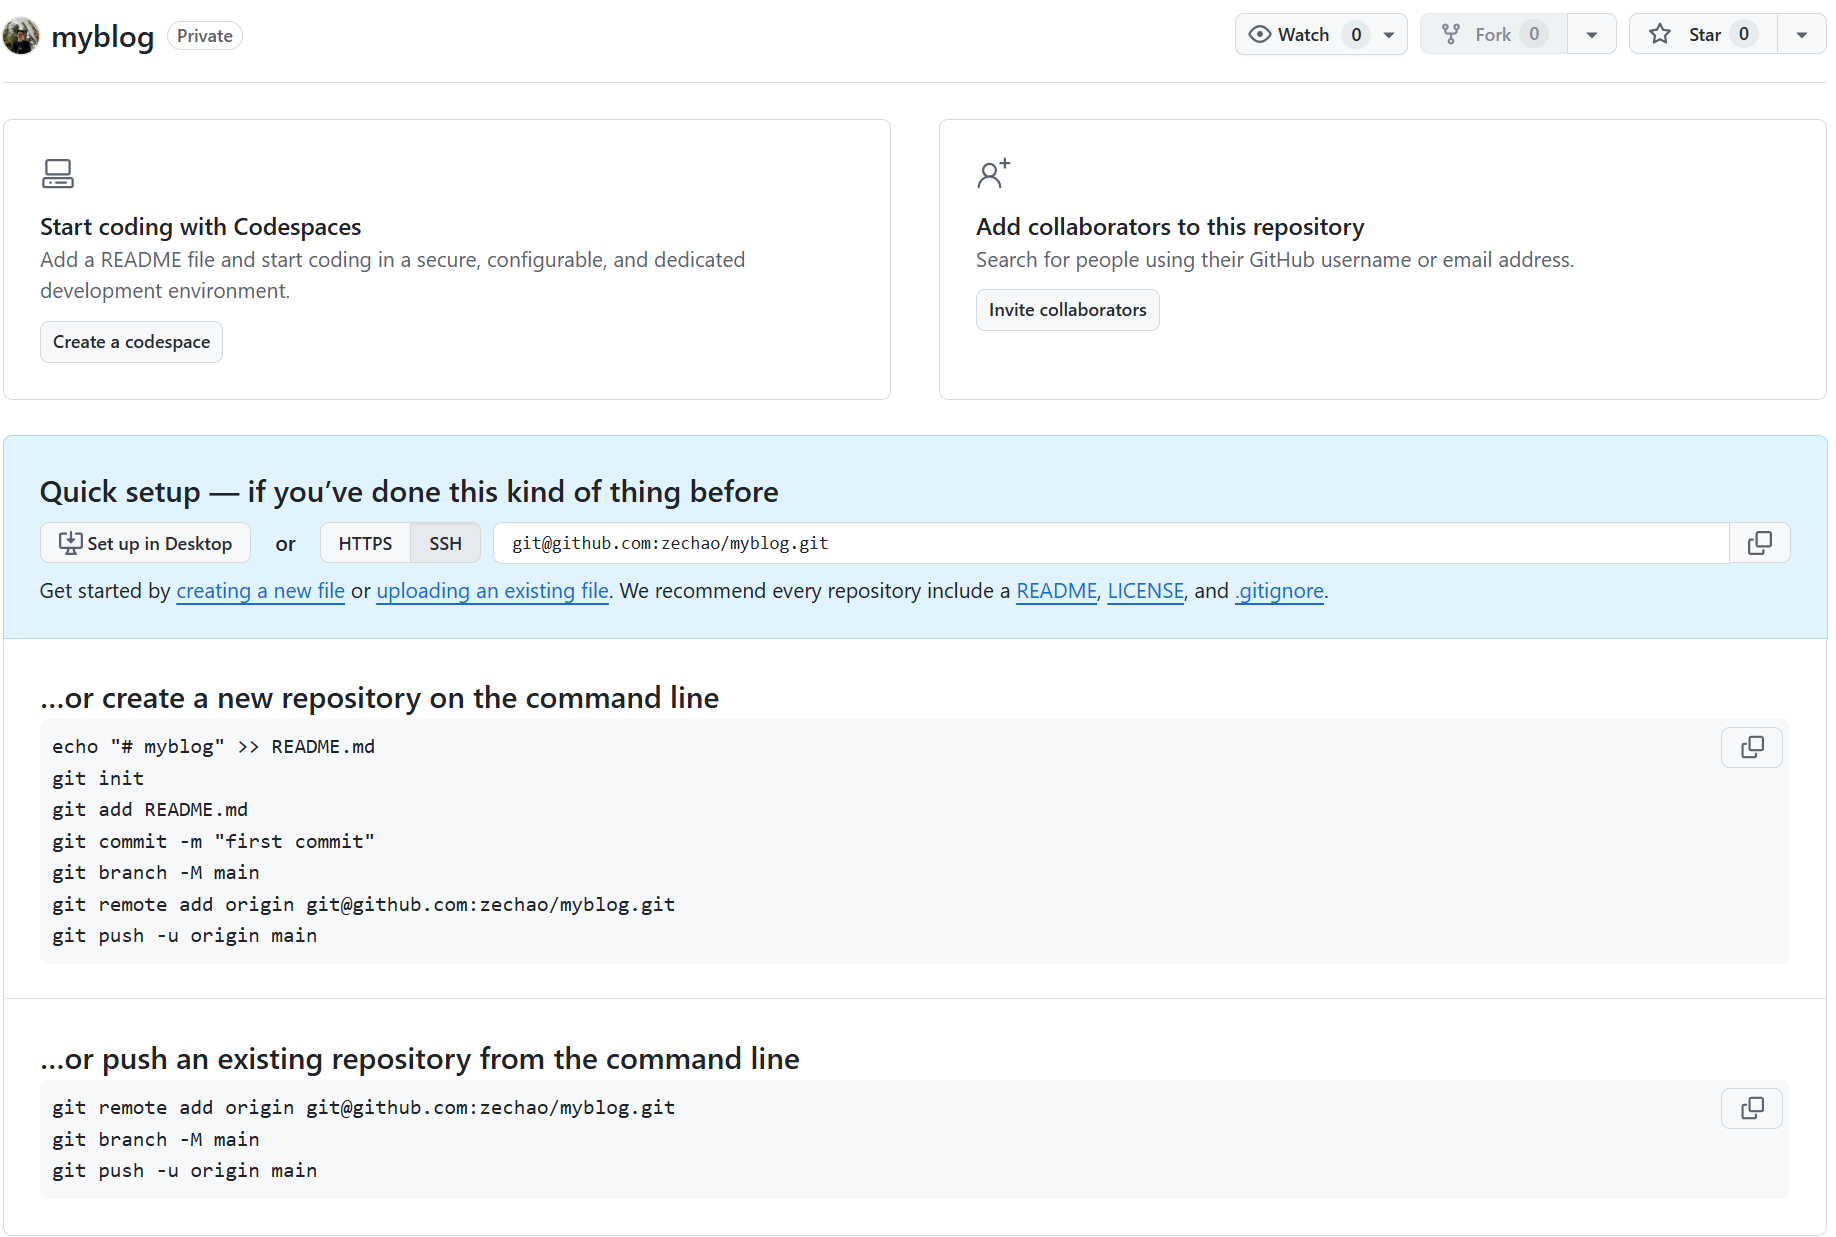
Open your terminal and navigate to your Hugo project folder:
- Add your files and commit
- Add GitHub as a remote
- Push your code
1git init
2git add .
3git commit -m "Initial commit: Hugo resume site"
4
5git remote add origin [email protected]:zechao/myblog.git
6git branch -M main
7git push -u origin main
Your github page should looks like this: https://github.com/zechao/myblog
Publish your blog using CloudFlare
Using Cloudflare to publish your Hugo blog gives you faster global performance (thanks to their CDN), free HTTPS with automatic SSL certificates, protection against DDoS attacks and bad bots, and easy setup for custom domains—all for free. It ensures your blog is secure, loads quickly for visitors anywhere in the world, and stays online even during traffic spikes or attacks.
To deploy our blog store in our gihutb, We’ll following this tutorial to deploy our blog
https://developers.cloudflare.com/pages/framework-guides/deploy-a-hugo-site/#deploy-with-cloudflare-pages
- Connect to your GitHub account, it will redirect you to Github.
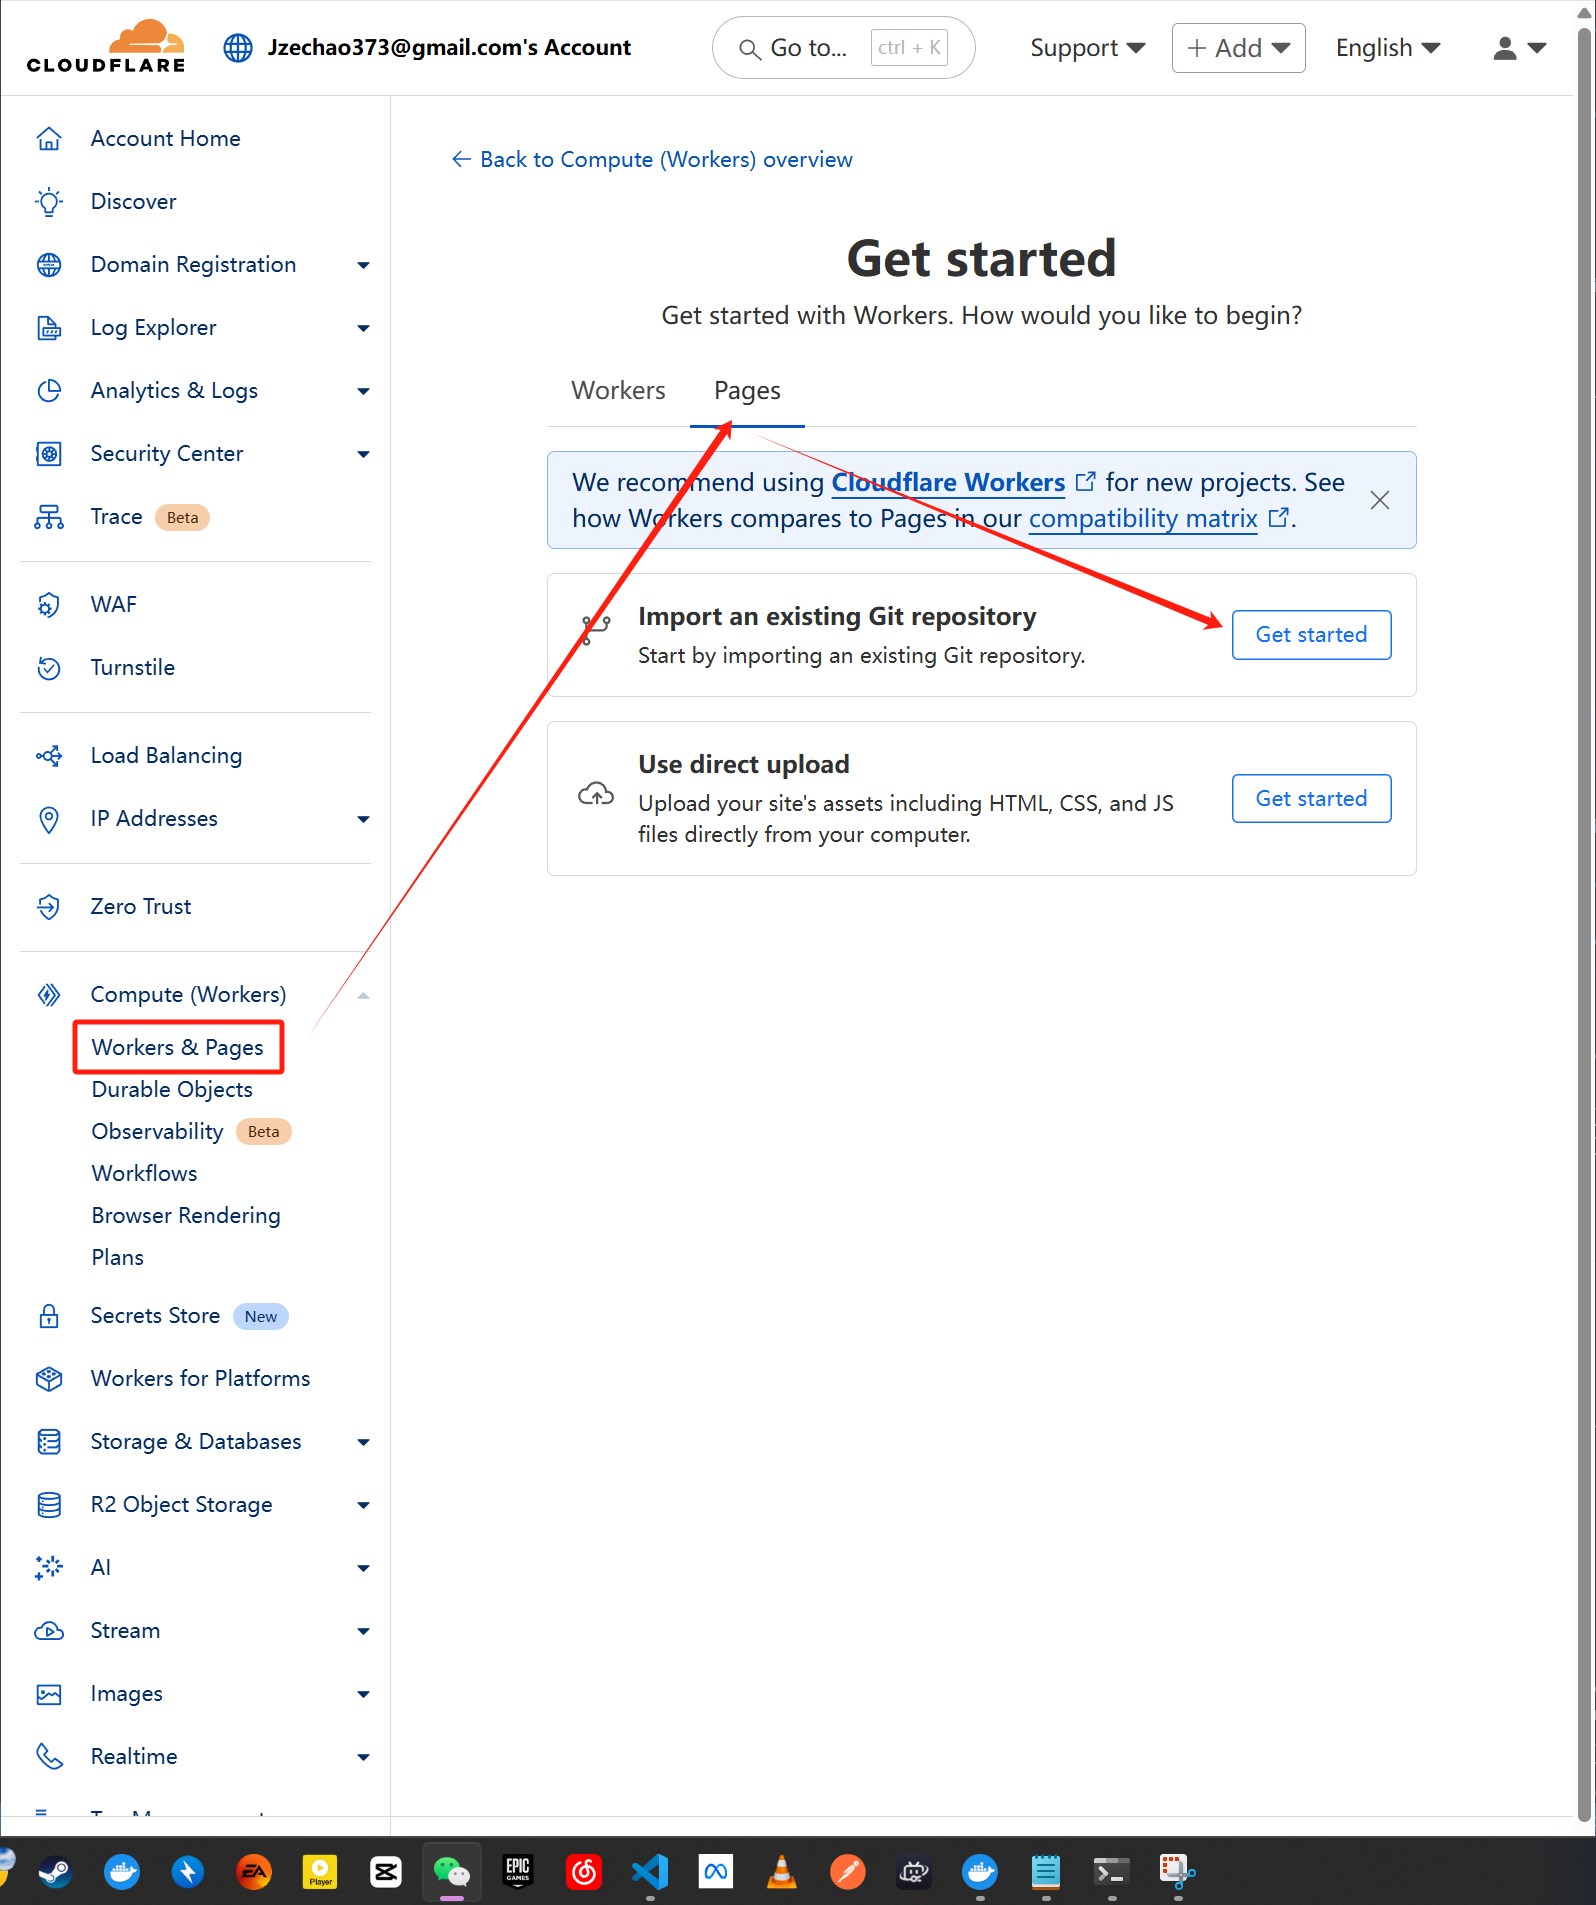
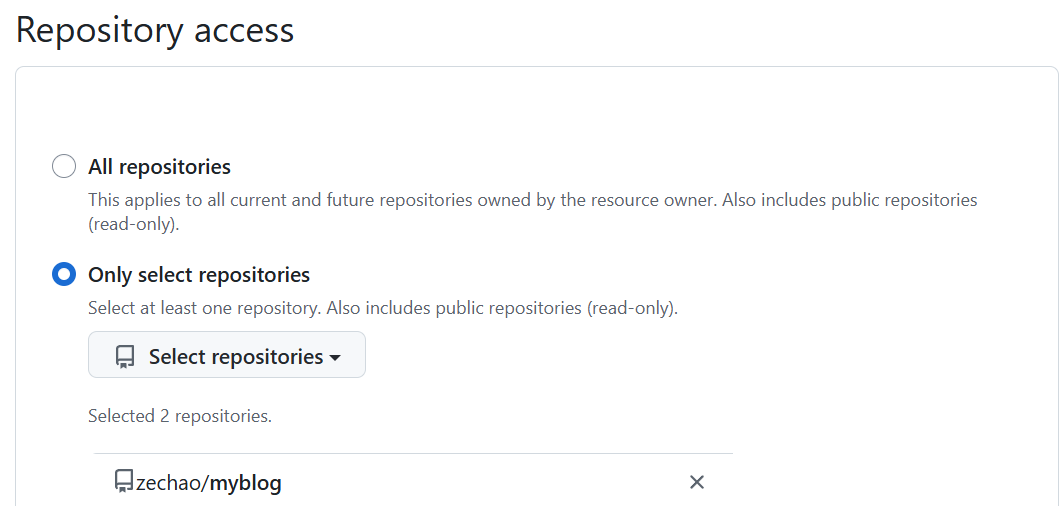
- Grant Cloudflare access to your blog repository and click Save.
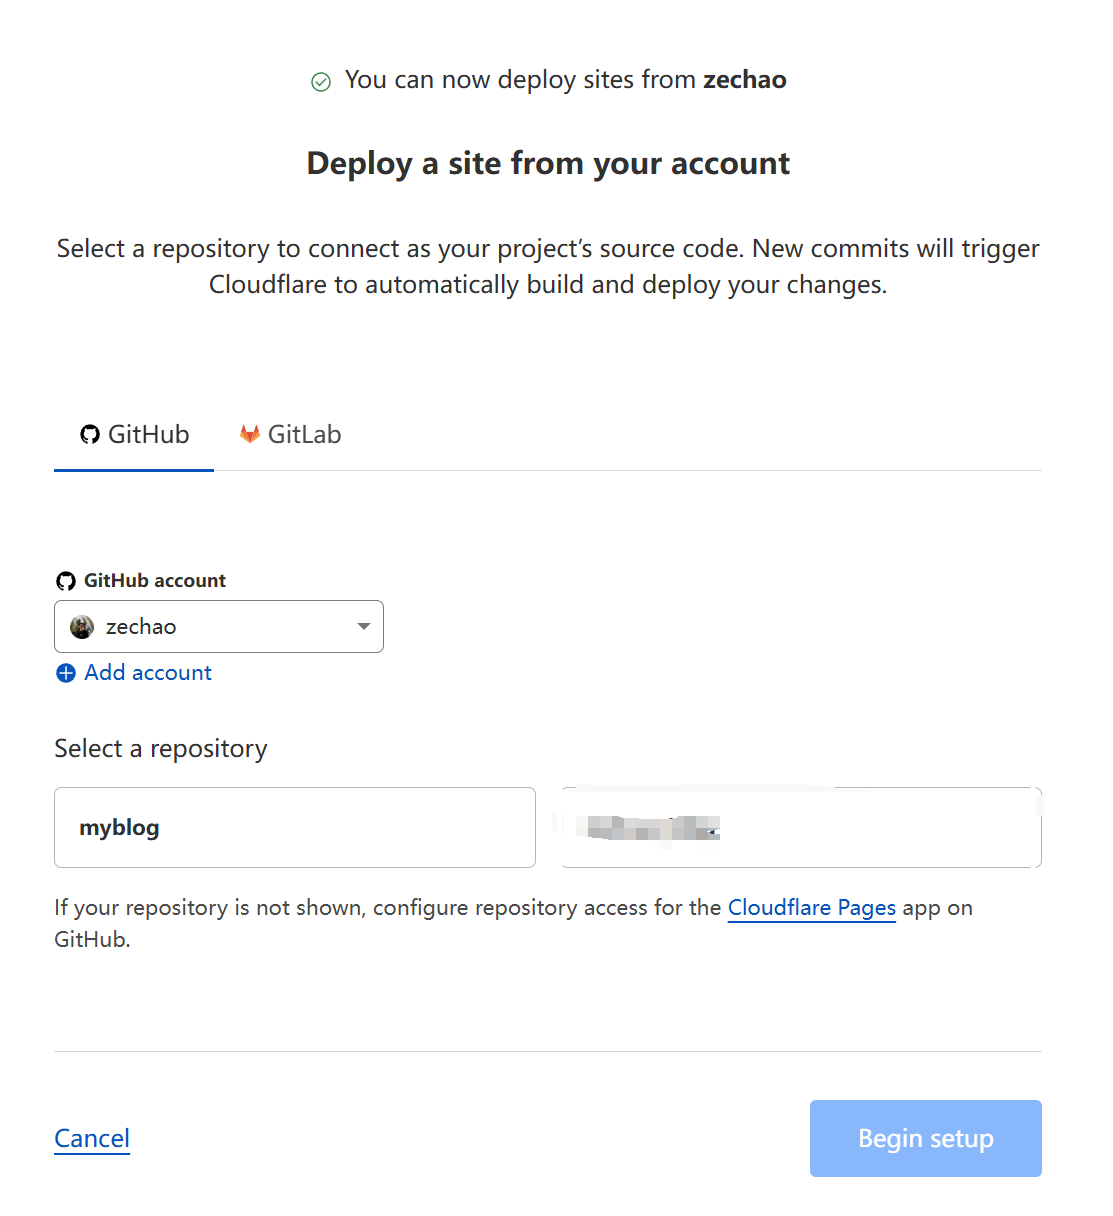
- Select your repository and click Begin setup
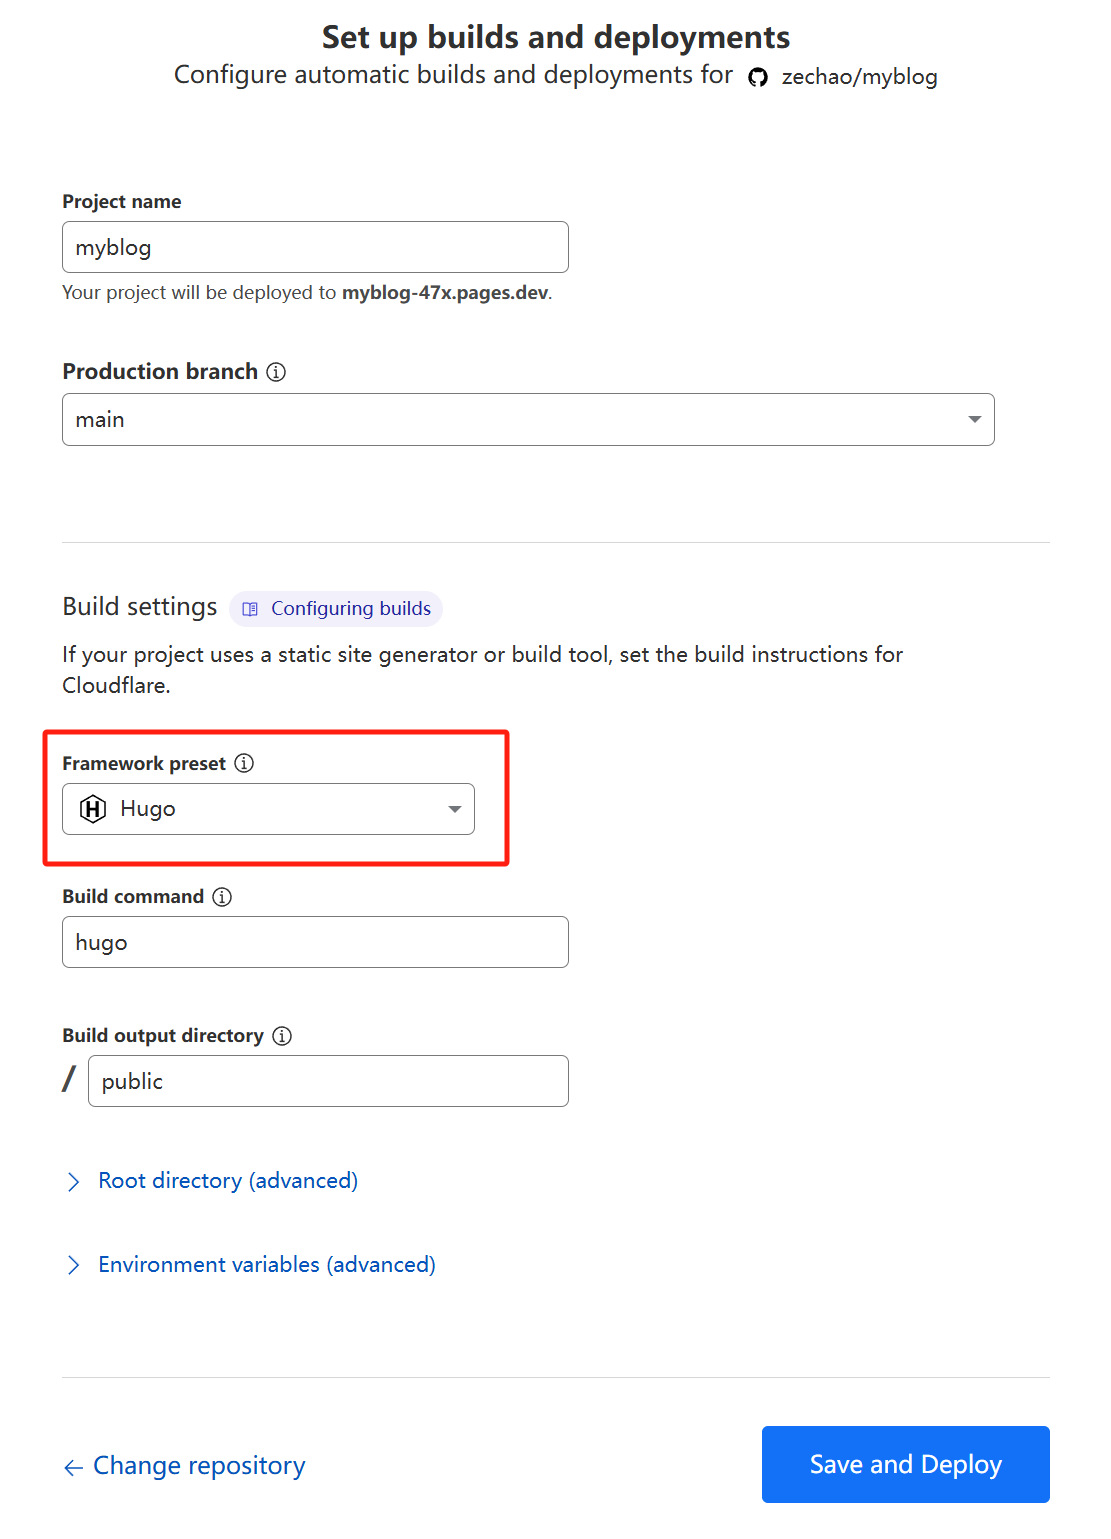
- Change Framework preset to
Hugo, then click Save and Deploy
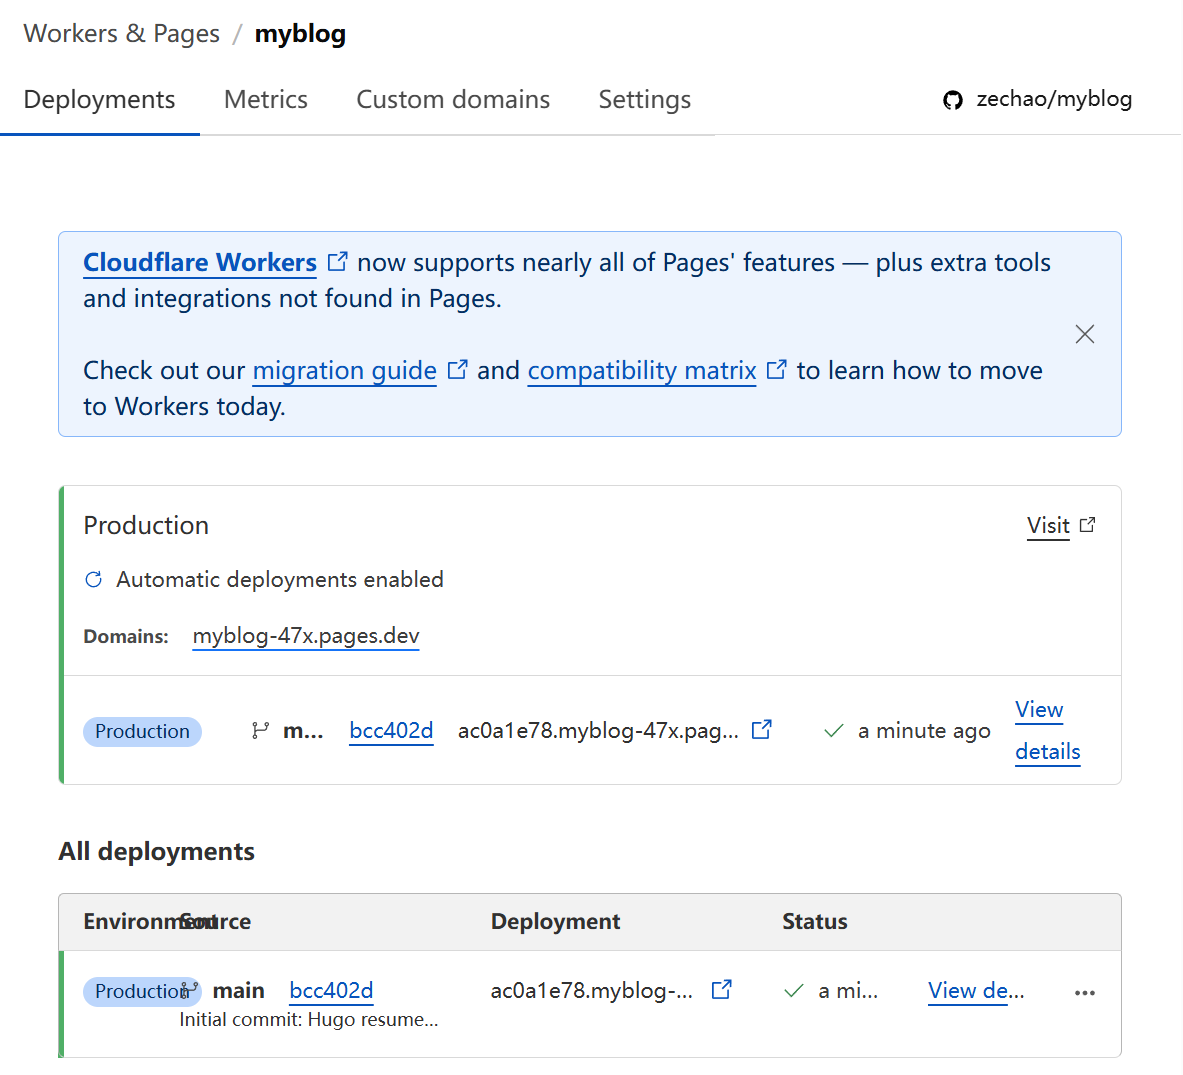
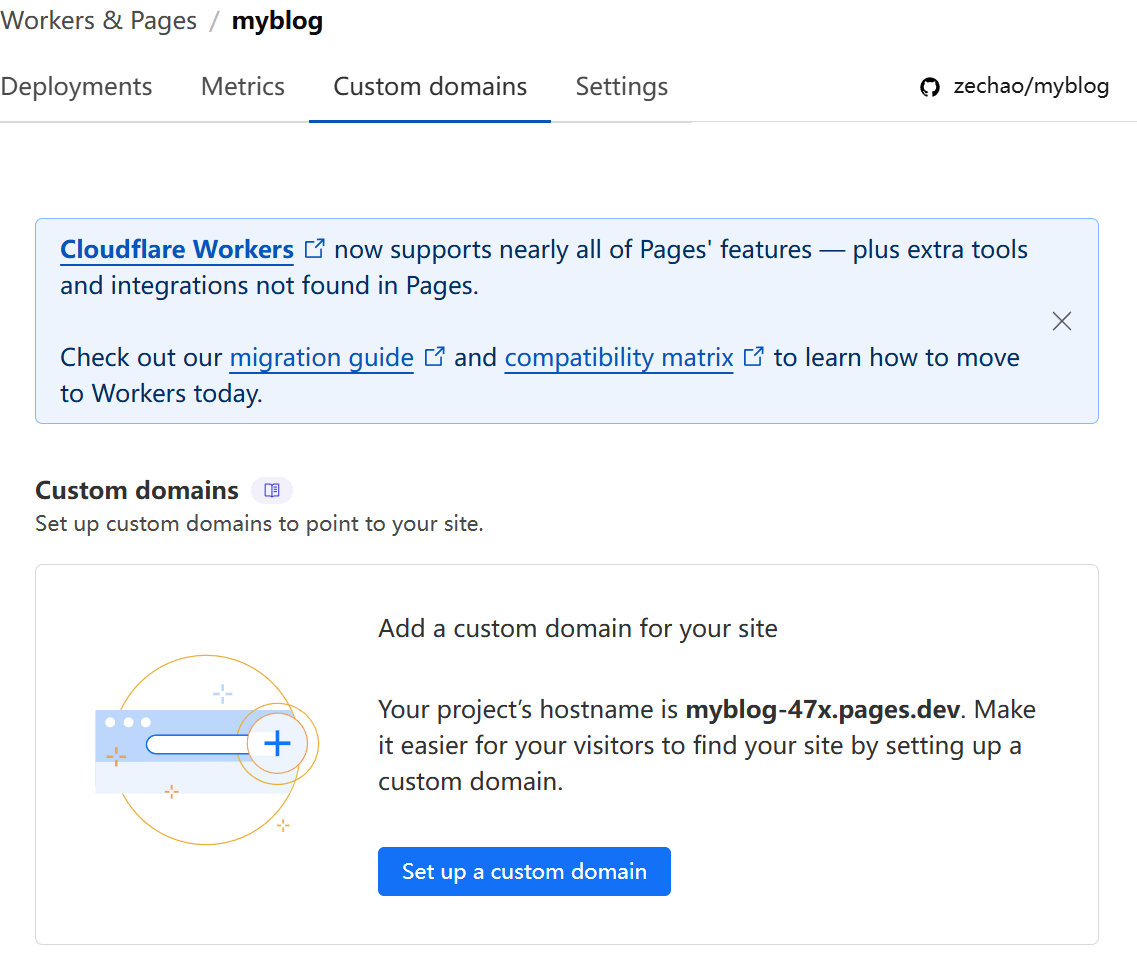
- 🎉 Your blog is now live! You’ll see it published on your Cloudflare dashboard, you’ll find the url of your webpage. https://myblog-47x.pages.dev/
You can also setup a custom domain here, but we won’t cover that in this tutorial.
Update your baseURL
Now that we have our domain, which is https://myblog-47x.pages.dev/ in my case, we have to update our hugo.toml configuration set base url to baseURL = 'https://myblog-47x.pages.dev/'
For the full configuration, check out the repository: https://github.com/zechao/myblog.
Once you push this change to GitHub, Cloudflare will automatically detect it and rebuild your website for you. 🚀
Add a Comment Section
A comment section is an essential part of any blog—it helps you engage with your readers and collect valuable feedback on your posts.
To configurate comment section we have to follow this tutorial: https://stack.jimmycai.com/config/comments. there’are many providers, we’re going to use Disqus.
Here’s the Steps to intgrate Disqus into your Hugo website.
- Sign up: https://disqus.com/publishers/signup/
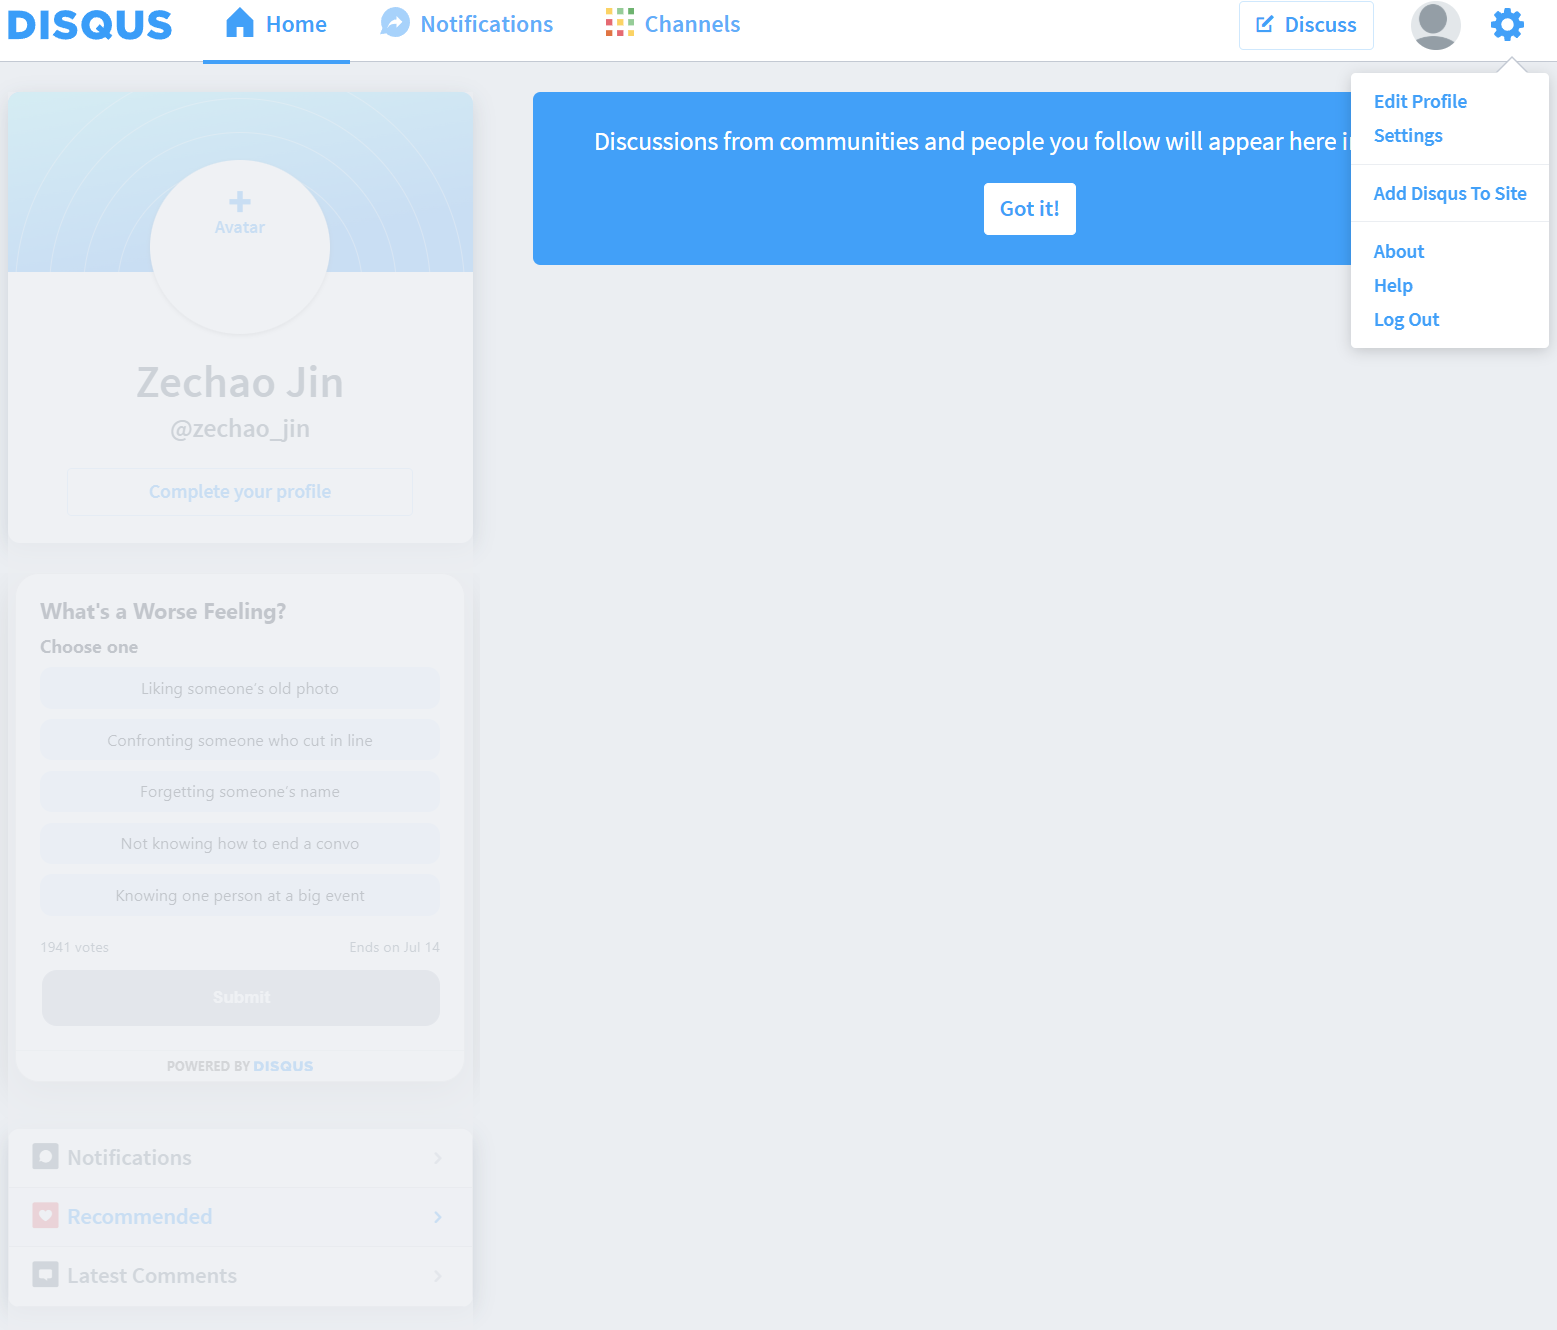
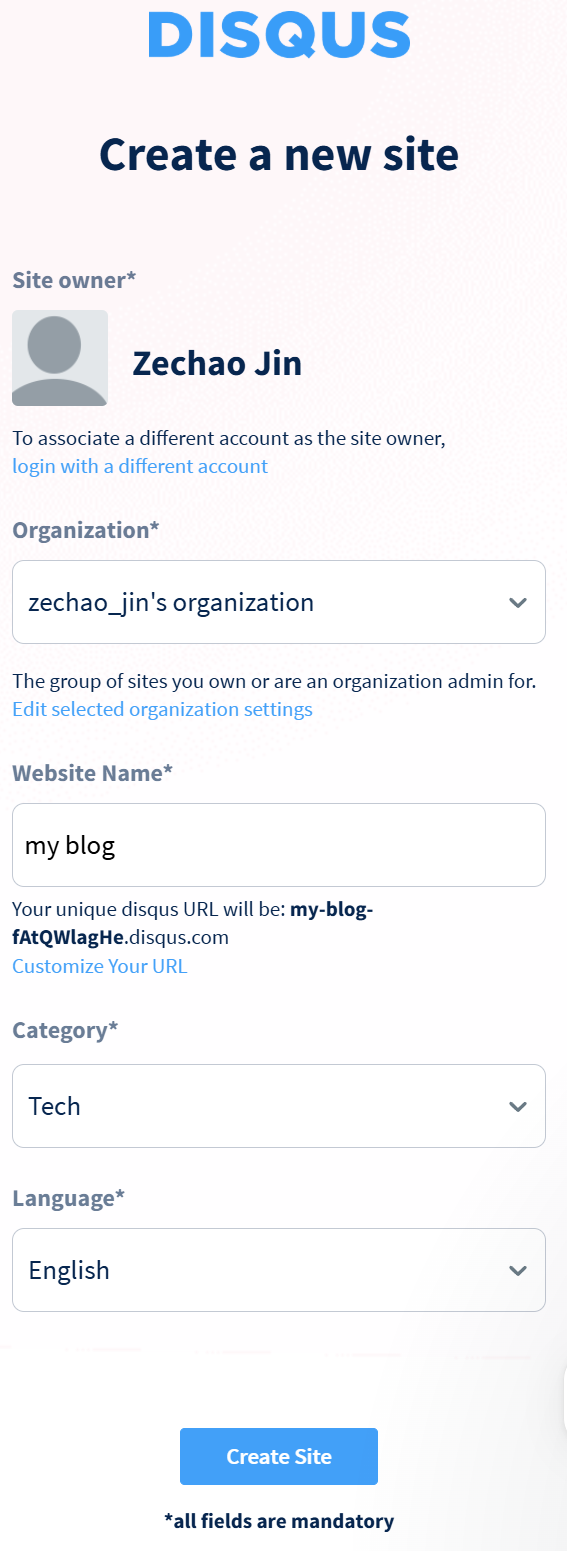
- Go to your account home page, and click Add Disqus To Site, or go to: https://disqus.com/admin/create/, this will create a site to configure your Disqus.
When you have your site created, set your Website URL, and other configurations as your need.
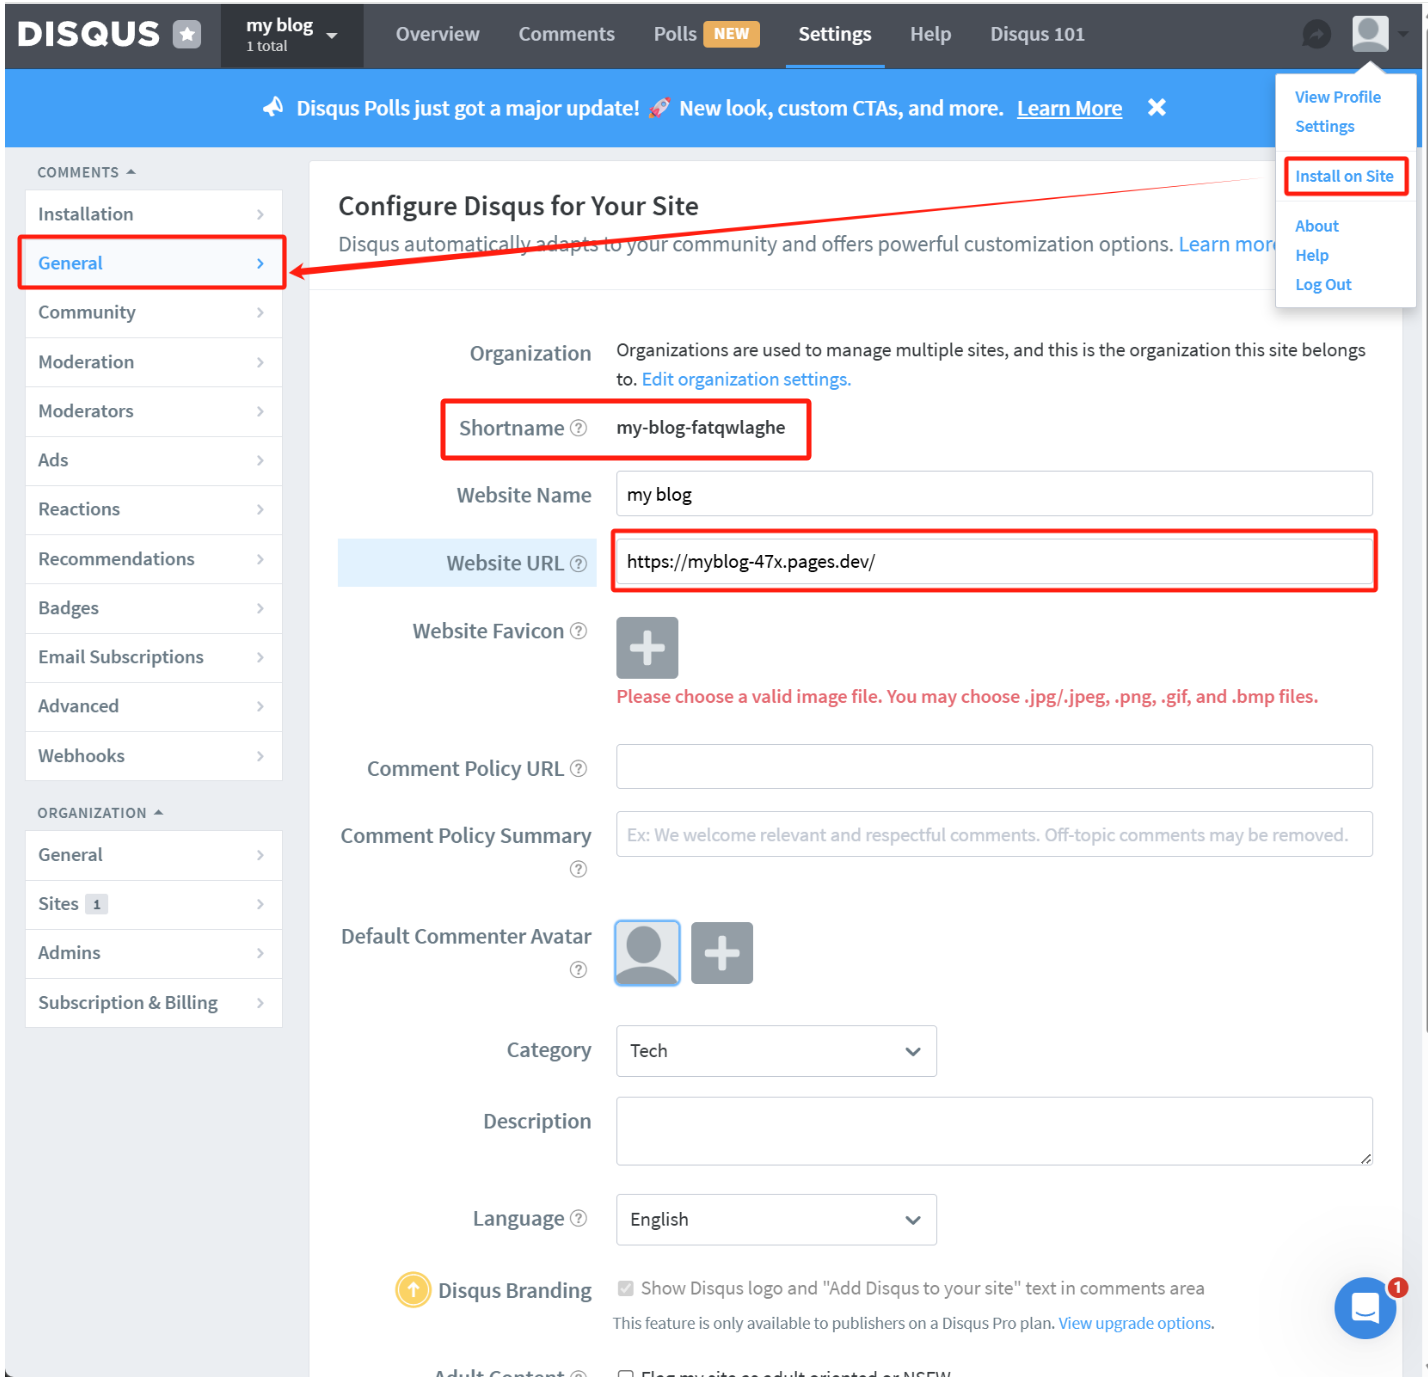
- Last, add following configuration in your
hugo.tomland thedisqusShortnamewith the value ofShortnameon the top of your config file. Your final config file should look like follow:
 1baseURL = 'https://myblog-47x.pages.dev/'
 2title = 'Zechao Jin'
 3languageCode = 'en-us'
 4theme = ["hugo-theme-stack", "almeida-cv"]
 5disqusShortname = "my-blog-fatqwlaghe"
 6
 7[params.sidebar.avatar]
 8enabled = true
 9local = true
10src = "img/zechao.jpg"
11
12[params.article]
13math = true
14toc = true
15readingTime = true
16license.enabled = true
17license.default = "Licensed under CC BY-NC-SA 4.0"
18
19[params.widgets]
20homepage = [
21    { type = "search" },
22    { type = "categories", params = { limit = 10 } },
23    { type = "tag-cloud", params = { limit = 10 } },
24]
25page = [{ type = "toc" }]
26
27[params]
28# param for almeida-cv
29enableMetaTags = true
30colorLight = "#fff"
31colorDark = "#666"
32colorPageBackground = "#ddd"
33colorPrimary = "#e3bfb8"
34colorSecondary = "#aaa"
35colorIconPrimary = "#fff"
36colorIconBackground = "#e3bfb8"
37colorRightColumnBackground = "#f5f5f5"
38colorRightColumnHeadingText = "#666"
39colorRightColumnBodyText = "#666"
40colorRightColumnIconPrimary = "#fff"
41colorRightColumnIconBackground = "#e3bfb8"
42pages = 1
43# Set this param to 'true' to swap the bar positions
44swapColumns = true
45
46
47[params.comments]
48enabled = true
49provider = "disqus"
Final Result
Finally, you will see your article with comment section.
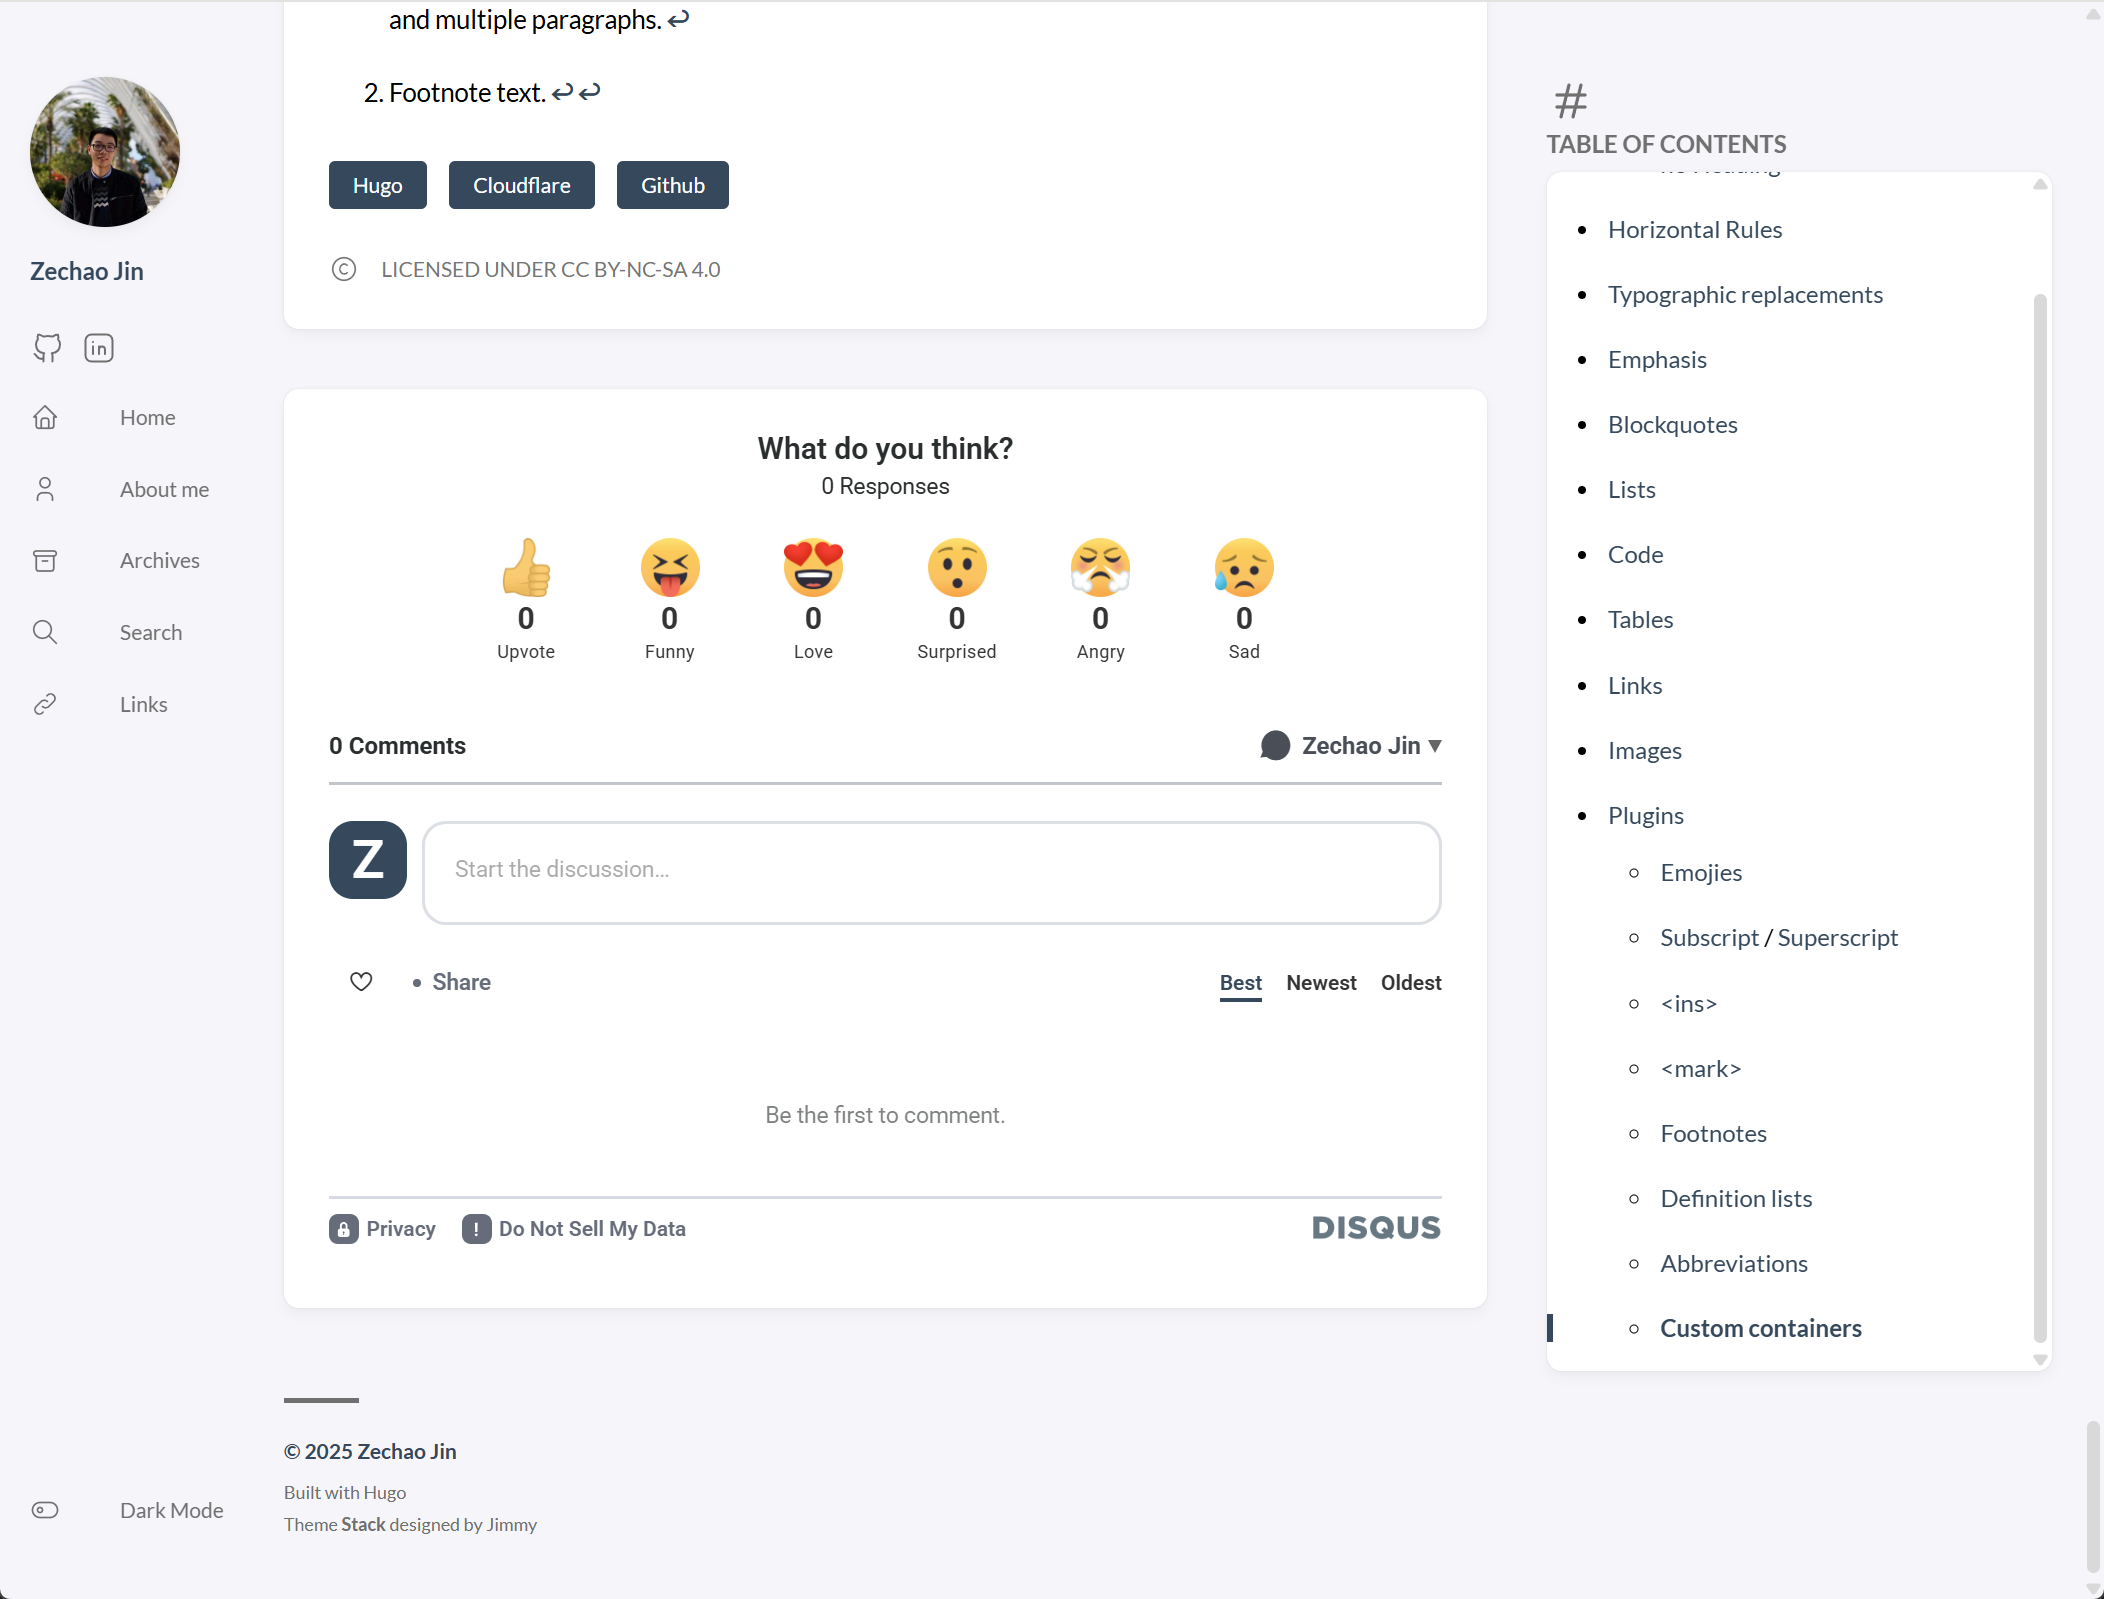
Final Result